

Before the installers arrive, three things must be in place: correctly sized utilities (cold water, drainage, electricity, and gas where applicable) within a short distance of the planned position; adequate clearances and a level, load-bearing floor; and a Gas Safe engineer or BS 7671-qualified electrician on site to make the final connections. Miss any one of these and you are looking at a rescheduled install, an emergency call-out, or a voided warranty.
Site-readiness checklist for the day of installation:
- Cold water supply within ~1 metre (3 ft) of the unit, with individual shut-off valves. Where a water filter is fitted, two separate inlets are required, each with its own shut-off.
- Drainage point within a short distance of the unit and NOT positioned where any oven leg will sit.
- Electrical supply confirmed to manufacturer specification (single or three phase, correct breaker rating, dedicated circuit, earthed to BS 7671).
- Gas supply within a short distance of the rear of the unit for gas models; Gas Safe-registered engineer on site for connection.
- Water quality: drinking-quality (WRAS-compliant fittings), pressure within manufacturer range, and hardness within limits (typically ≤120 mg/L CaCO₃).
- Floor level, load-bearing, and smooth; oven stand or cabinet confirmed if required.
- Manufacturer installation manual on site; rating plate details recorded.
- Site contact available for last-minute decisions.
Pro Tip: The single most common cause of an overnight delay is utilities that do not meet manufacturer specification — particularly electrical panel capacity. Confirm breaker size and phase requirements with an electrician before you order the oven, not after it arrives.
Table of Contents
- What does a pre-install site survey actually cover?
- What utility specifications does a combi oven need?
- How do you manage delivery and on-site handling safely?
- What commissioning steps should you expect from the installer?
- Who is authorised to install a combi oven in the UK?
- How long does installation take, and what drives the cost?
- What are the most common installation mistakes, and how do you avoid them?
- Which accessories and installation services does Thecommercialovenstore offer?
- Key takeaways
- What most guides miss about combi oven installation
- Ready to order, install, and get cooking?
- Useful sources for installers and site managers
What does a pre-install site survey actually cover?
A thorough site survey done before delivery day saves far more time than it takes. The goal is to confirm that the oven can physically reach its final position, sit safely once there, and be serviced without dismantling the kitchen.
Access route measurements

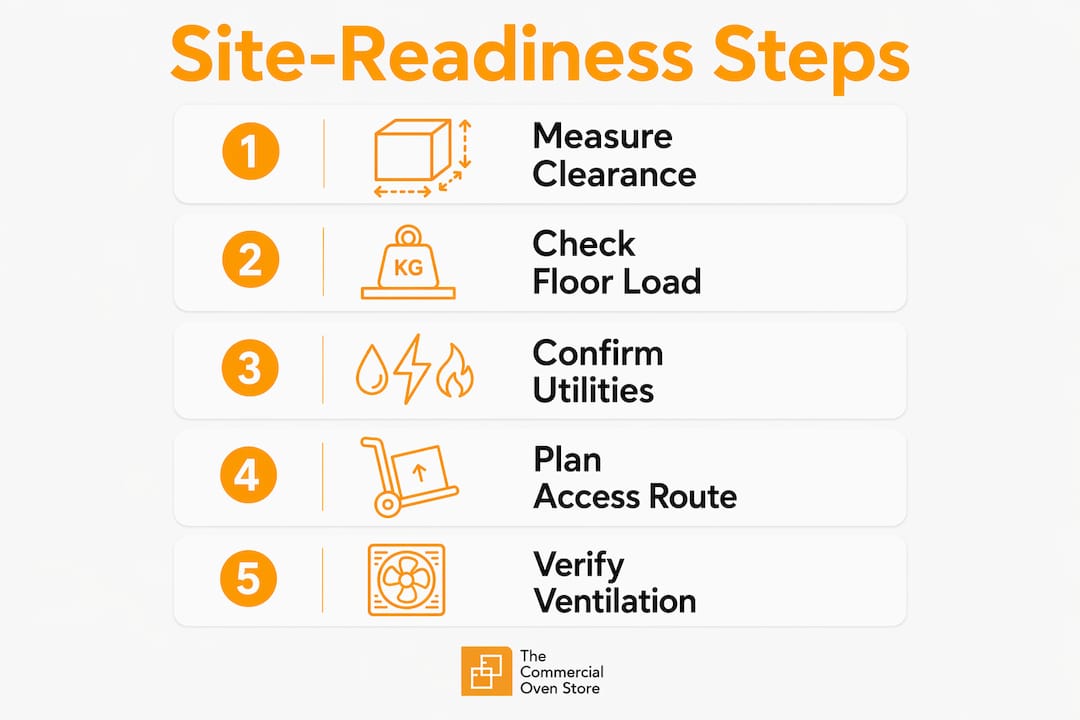
Walk the entire delivery route from the loading bay to the final position and record every constraint: door opening widths, corridor widths, ceiling heights, and any 90-degree turns. A large combi oven can stand over 1.8 m tall and weigh several hundred kilograms, so a corridor that looks wide enough rarely is once you account for the pallet and handling equipment. Note lift dimensions separately — internal depth, door opening, and rated load capacity all matter.
Floor load capacity and levelling
Manufacturer installation instructions require the appliance to sit on a smooth, perfectly level floor capable of bearing the full operational load. For a 20-pan combi, that load can be substantial once the oven is filled with product and water. If the floor is uneven, the door seals will not close correctly and condensate will pool in the wrong places. An oven stand or cabinet is the standard solution; confirm the stand height matches the working height your team needs.
Service clearances
Minimum clearances are not just about fitting the oven in — they determine whether a service engineer can access the unit without moving it. A practical minimum of 450 mm on the service-access side is widely cited in field guidance. Check the specific manufacturer manual for rear clearances; some models require a meaningful gap between the oven and any adjacent hot equipment such as fryers or ranges. Rational’s installation documentation, for instance, sets specific back and side clearances that must be maintained for both safety and warranty validity.
Measurement reference table
| Check | What to measure | Example value | Why it matters |
|---|---|---|---|
| Door opening width | Clear opening in mm | — | Oven body plus handling equipment must pass through |
| Corridor width | Narrowest point in mm | — | Allows pallet truck or trolley to manoeuvre |
| Lift internal depth | Floor to ceiling and door width | Confirm against oven height + stand | Prevents getting the unit stuck mid-route |
| Floor clearance (service side) | Gap to nearest fixed wall or unit | ≥450 mm | Required for service access |
| Stand height | Floor to oven base | Matches ergonomic working height | Affects door operation and operator comfort |
| Rear clearance | Gap to rear wall or adjacent equipment | Per manufacturer manual | Safety and ventilation requirement |
Pro Tip: Photograph every measurement point during the survey and attach the images to the site-prep checklist. When the delivery crew arrives, there is no ambiguity about which doorway was the problem or whether the lift was confirmed.
What utility specifications does a combi oven need?
Getting the utilities right is where most installations either succeed or stall. The specifications below reflect UK-relevant field guidance and manufacturer manuals; always cross-reference with the specific manual for the model you are installing.
Cold water supply
The cold water inlet must be within approximately 0.9 m (3 ft) of the unit. Water must be drinking quality, supplied through WRAS-approved fittings. Where a water softener or filter is installed, two separate water line connections are required, each with its own isolation valve. Typical pressure requirements sit in the range of 2.0–3.0 bar; water hardness should generally not exceed 120 mg/L CaCO₃, though some manufacturers specify tighter limits — check the rating plate and manual. Never use washing machine hoses for the connection. Washing machine hoses typically have an inner diameter of only 3/8 inch despite appearing to fit a 3/4 inch connection, which is wholly inadequate for the flow demands of a commercial combi.
Drainage and condensate
The drain must be within a short distance of the unit and must not sit directly beneath any oven leg position or in front of the unit where it becomes a trip hazard. Drain diameter requirements vary by oven size: 1.5 inches for space-saver models, 2 inches for 6- or 10-pan ovens, and 2.5 inches for 20-pan ovens. An air gap between the oven drain outlet and the floor drain is required to prevent back-siphonage. The drain pipe must fall consistently toward the drain point; a condensate pump is needed where gravity drainage is not achievable.
Electrical supply
Combi ovens typically require either a single-phase or three-phase supply depending on model size and output. Smaller units often run on single-phase 230 V; larger models require three-phase 400 V with a dedicated circuit and appropriately rated circuit breaker. All fixed electrical connections must be made by a qualified electrician working to BS 7671 (the IET Wiring Regulations). The circuit must be earthed and bonded correctly; equipotential bonding to the oven chassis is a standard requirement. Never share the oven’s circuit with other high-draw equipment.
Gas supply (where applicable)
For gas-fired models, the gas supply must terminate within approximately 1 metre of the rear of the unit. Do not reduce the pipe diameter from the size specified in the manufacturer manual — undersizing the supply causes pressure drop and combustion problems. All gas work in the UK must be carried out by a Gas Safe-registered engineer. This is a legal requirement, not a manufacturer preference.
Ventilation and extraction
Most commercial combi ovens must be installed beneath a ventilation canopy. The canopy must be sized to handle the oven’s heat and steam output; check the manufacturer’s specification for minimum canopy dimensions and extraction rates. Some models are available with integrated ventilation (such as Rational’s UltraVent system), which changes the canopy requirement — confirm with the manufacturer before finalising the extraction design.
Utility specification reference table
| Parameter | Typical requirement | Notes |
|---|---|---|
| Water pressure | 2.0–3.0 bar | Check manufacturer manual for model-specific range |
| Water hardness | ≤120 mg/L CaCO₃ | Some models specify tighter limits |
| Water proximity | ≤0.9 m (3 ft) | Two inlets required with filter |
| Drain proximity | ≤0.9 m (3 ft) | Not under leg positions |
| Drain diameter (space saver) | 1.5 inches | Per Henny Penny service guidance |
| Drain diameter (6/10 pan) | 2 inches | Per Henny Penny service guidance |
| Drain diameter (20 pan) | 2.5 inches | Per Henny Penny service guidance |
| Electrical (small models) | Single phase 230 V | Dedicated circuit, BS 7671 compliant |
| Electrical (large models) | Three phase 400 V | Dedicated circuit, correct breaker rating |
| Gas proximity | ≤1 m from rear | Gas Safe engineer required |
Pro Tip: Ask the water authority for a hardness certificate for your postcode before the oven arrives. In hard-water areas of England — much of the South East and Midlands — you will almost certainly need a water softener or scale filter, and fitting one after installation is more disruptive than planning for it upfront.
How do you manage delivery and on-site handling safely?
A combi oven is heavy, tall, and expensive. Damage during delivery or positioning is more common than most buyers expect, and it is almost always avoidable.
Staging and personnel
Notify the delivery team of any access constraints identified during the site survey. Designate a clear staging area — ideally a loading bay or ground-floor storage space — where the unit can sit on its pallet while the route is prepared. Have at least two people available to assist the delivery crew; some larger units require a forklift or specialist lifting equipment.
Prepare the route before the delivery vehicle arrives:
- Remove any loose floor grilles, mats, or obstacles along the entire path.
- Apply protective tape or padding to door frames and corners that the unit will pass close to.
- Confirm the lift is available and reserved if the oven is going to an upper floor.
- Place drive-over ramps at any floor drains or grilles along the route so the pallet truck rolls smoothly.
- Confirm the oven stand or cabinet is already in position at the final location.
Handling the unit
Follow the manufacturer’s handling instructions precisely. Rational and Atosa both specify that the oven must only be lifted using the designated fork insertion points; never lift from the front or rear panels. Tilting a combi oven risks internal damage to water connections and door mechanisms. Keep the unit upright at all times during transit.
If the oven must be stored on site before installation, keep it in its original packaging in a dry, temperature-stable environment. Record the serial number and rating plate details from the packaging label before unpacking.
Unpacking and inspection checklist
- Inspect the outer packaging for transit damage before signing the delivery note.
- Photograph any damage to packaging or the unit itself and note it on the delivery paperwork.
- Record the serial number, model number, and rating plate data.
- Check all accessories and installation components against the packing list.
- Confirm the manufacturer installation manual and any supplied installation kit components are present.
- Do not discard packaging until the commissioning check is complete and the unit is confirmed operational.
What commissioning steps should you expect from the installer?
Commissioning is the structured process that confirms the oven is connected correctly, operating safely, and ready for use. A competent installer will work through the following sequence before signing off.
- Pre-power visual checks. Inspect all connections for correct assembly; confirm the unit is level and stable on its stand; check that all packaging materials have been removed from inside the oven.
- Electrical isolation test. Verify the circuit is isolated before making final connections; confirm earth continuity and insulation resistance to BS 7671 requirements.
- Water connection and leak test. Open the water supply slowly and inspect all connections for leaks; confirm flow rate and pressure at the inlet.
- Drain flow and air-gap check. Run water through the drain circuit and confirm correct fall, no blockages, and a visible air gap at the floor drain connection.
- Gas pressure test (gas models only). A Gas Safe engineer must test supply pressure, check for leaks using an approved method, and confirm burner operation.
- First heat cycles. Run the oven through its initial heat cycles per the manufacturer’s commissioning procedure; some models require a burn-off cycle to clear manufacturing residues.
- Safety interlock and calibration checks. Test door interlocks, over-temperature cut-outs, and any steam safety devices; confirm temperature calibration against a reference thermometer.
- Smoke and ventilation check. Confirm the extraction canopy is drawing correctly and that no smoke or steam escapes into the kitchen during operation.
- Trial cook. Run a representative cook cycle with product to confirm even heat distribution and correct steam function.
Operator training at handover
The installer should walk the kitchen team through basic controls, the daily cleaning cycle (including drain care and descaling frequency), and the procedure for calling out the service engineer. For Rational iCombi models, this includes the ConnectedCooking remote monitoring setup if the site has opted for it.
Handover documentation
The site manager should receive and retain:
- Electrical installation certificate (BS 7671 compliant)
- Gas Safe certificate (gas models only)
- Manufacturer commissioning form, signed by the installer
- Warranty activation confirmation
- Service contact details and recommended service interval
The site manager signs the handover checklist once all commissioning steps are complete and all documentation is in hand. Do not accept a verbal sign-off — the paperwork is what your insurer will ask for.
Who is authorised to install a combi oven in the UK?
The short answer: qualified tradespeople, not general kitchen fitters. The specific qualifications depend on which utilities the installation involves.
Required qualifications by trade:
- Gas work: Any connection, disconnection, or testing of gas pipework or appliances must be carried out by a Gas Safe-registered engineer. This is a legal requirement under the Gas Safety (Installation and Use) Regulations 1998. Verify the engineer’s Gas Safe registration number before work begins.
- Electrical connections: Fixed electrical connections to a commercial combi oven must be made by a qualified electrician working to BS 7671 (the IET Wiring Regulations, 18th Edition). In commercial premises, this work should be certified under the appropriate Part P or commercial electrical certification scheme.
- Water fittings: Plumbing connections should comply with the Water Supply (Water Fittings) Regulations 1999 and relevant WRAS guidance. Use only WRAS-approved fittings and hoses.
- Manufacturer-authorised technicians: Many manufacturers, including Rational, Alto-Shaam, and Unox, require that commissioning be carried out by an authorised service technician to activate the warranty. Manufacturer manuals are explicit: incorrect installation may void the warranty and create safety hazards.
Warranty and liability depend on who does the work. Using an unqualified installer — even one who completes the job without an obvious incident — can void the manufacturer warranty, invalidate your public liability insurance, and leave you personally liable if a fault causes injury or property damage. The manufacturer installation manual is a legal document in this context: installation, repair, and non-routine maintenance must be performed by qualified technicians.
HSE responsibilities during installation
The Health and Safety Executive (HSE) expects employers to manage risks during installation work. This means a written risk assessment for the installation activity, a safe system of work (including isolation procedures for electrical and gas supplies), and appropriate PPE for the installation team. Where the installation involves modifications to extraction or fire suppression systems, notify your local building control authority and confirm whether a building notice or full plans application is required.
Insurance and documentation
Insurers increasingly require certified installation records as a condition of commercial kitchen cover. Keep every certificate — Gas Safe paperwork, electrical sign-off, manufacturer commissioning form — in a dedicated file and share copies with your insurer and facilities manager. If you ever make a claim related to the oven, these documents are what determine whether the claim is paid.
How long does installation take, and what drives the cost?
A straightforward combi oven installation on a well-prepared site — utilities in place, correct clearances, access confirmed — typically completes in a single day. Two engineers unpack, position, connect, and commission the unit, with operator training at the end. That is the best-case scenario.
The timeline stretches when the site needs upgrading. Electrical panel upgrades, new dedicated circuits, gas line extensions, drain relocation, and extraction modifications are all separate trades that must be scheduled and completed before the oven can go in. In practice, a site that needs electrical and extraction work before installation can add one to three weeks to the overall timeline.
Common cost drivers beyond the oven price:
- Electrical panel upgrade or new dedicated circuit installation
- Three-phase supply where only single-phase currently exists
- Gas line extension or new gas meter capacity
- Drain relocation or installation of a condensate pump
- Extraction canopy upgrade or new hood installation
- Specialist lifting equipment (crane, forklift) for upper-floor installations
- Structural reinforcement if the floor cannot bear the load
- Unforeseen access problems discovered on delivery day
Scheduling advice for working kitchens:
- Book the installation during a planned closure or a low-revenue period (early morning, overnight, or a Monday in a restaurant that closes Sundays).
- Confirm all trade bookings — electrician, gas engineer, plumber — before ordering the oven, not after.
- Build a contingency of at least one additional day into the schedule for unforeseen issues.
- Coordinate with your extraction contractor separately; hood work often takes longer than expected.
For managing the combined cost of the oven and installation work, Thecommercialovenstore offers flexible payment options through iwocaPay, which allows you to spread the purchase cost rather than absorbing it as a single capital outlay.
What are the most common installation mistakes, and how do you avoid them?
Most installation problems are predictable. The same errors appear on site repeatedly, and nearly all of them are avoidable with a proper pre-purchase survey.
Drain in the wrong position. The drain point ends up directly beneath where an oven leg will sit, or beyond the 1-metre proximity limit. The fix requires a plumber and delays the install by days. During the site survey, mark the exact planned leg positions on the floor and confirm the drain is offset from all four.
Using washing machine hoses. This is more common than it should be. A washing machine hose may appear to fit a 3/4-inch connection but typically has an inner diameter of only 3/8 inch — less than half the bore needed for adequate flow. Use only manufacturer-recommended flexible hoses with the correct internal diameter and materials rated for continuous commercial use.
Underestimating electrical panel capacity. Buying the oven before an electrician has surveyed the panel is the most common oversight in the field. Many sites lack sufficient capacity for a large three-phase combi, and the upgrade turns a straightforward purchase into a significant renovation. Get the electrical survey done first.
Insufficient service clearance. Positioning the oven with less than the minimum service clearance means the service engineer cannot access the unit without moving it — which may require dismantling adjacent equipment. Keep the minimum 450 mm on the service-access side and leave enough space for a mobile oven rack to enter if the model requires it.
No fat separator for fatty-food operations. Where the oven is used regularly for roasting or cooking fatty foods, the condensate drain will carry fat into the drainage system. A fat separator fitted between the oven drain and the floor drain prevents blockages and keeps the site compliant with trade effluent requirements. An air gap between the oven outlet and the separator inlet is still required.
Pro Tip: Confirm the exact drain location during the site survey and mark it on a scaled floor plan before finalising the oven position. Moving a drain after the oven is in place is one of the most expensive single mistakes in a commercial kitchen fit-out.
Which accessories and installation services does Thecommercialovenstore offer?
Getting the right accessories specified at the point of purchase avoids the frustration of sourcing them separately under time pressure on installation day.
Recommended accessories and when you need them:
- Certified drain kits: Manufacturer-approved drain connection components that meet the required diameter and material specifications for your oven model.
- Water filters and softeners: Required in hard-water areas to protect the steam generator and maintain warranty validity; fit before commissioning.
- Fat separators: Needed wherever the oven will cook fatty foods regularly; protects the drainage system and keeps you compliant with trade effluent rules.
- Oven stands and plinths: Raise the oven to the correct working height and provide a stable, level base; some stands include integrated storage. The Rational iCombi Pro 10 GN1/1 and similar models are typically supplied without a stand, so confirm this at the point of order.
- Mobile oven rack ramps: Drive-over ramps that allow mobile oven racks to roll smoothly over floor drains and grilles during loading and unloading.
- Approved flexible hoses: Manufacturer-recommended hoses with the correct internal diameter and pressure rating; never substitute washing machine hoses.
Thecommercialovenstore supplies combi ovens from Rational, Unox, and other leading manufacturers, alongside the full range of compatible accessories. The team can advise on which accessories are required for your specific model and site conditions before you place the order.
Installation service: Thecommercialovenstore offers two-engineer installation visits, optional commissioning support, and warranty activation assistance. Having the supplier manage the installation means the commissioning is completed by people who know the equipment, the warranty paperwork is handled correctly from day one, and any issues that arise during the first heat cycles are dealt with on the spot rather than through a support ticket.
For sites that need to spread the cost of the oven and installation together, iwocaPay flexible payment options are available at checkout. It is worth factoring installation into the finance calculation from the start rather than treating it as a separate budget line.
Pro Tip: Order your oven stand, drain kit, and water filter at the same time as the oven. Lead times on accessories can be longer than expected, and arriving on installation day without a stand means the oven sits on the floor until it turns up.
Key takeaways
A compliant combi oven installation requires confirmed utilities within 1 metre, qualified tradespeople for gas and electrical connections, and full manufacturer documentation retained on site from day one.
| Point | Details |
|---|---|
| Utilities within 1 metre | Cold water, drainage, electricity, and gas (where applicable) must all be within approximately 0.9 m of the planned position before installation day. |
| Qualified installers only | Gas Safe registration is legally required for gas work; BS 7671-qualified electricians must make fixed electrical connections — both affect warranty and insurance. |
| Drain placement is critical | The drain must not sit under any oven leg position; confirm exact placement during the site survey to avoid costly rework. |
| Gather documentation | Retain the electrical certificate, Gas Safe paperwork, manufacturer commissioning form, and warranty activation confirmation for your insurer and facilities team. |
| Thecommercialovenstore | Supplies Rational, Unox, and compatible accessories with two-engineer installation and iwocaPay flexible payment options available. |
What most guides miss about combi oven installation
The technical specifications in this guide are accurate, but there is a gap between knowing the spec and actually getting an installation right first time. The problem is almost never the oven. It is the sequence of decisions made before the oven is ordered.
Sites that run into trouble tend to share one pattern: the oven was purchased, then the site survey happened, then the problems were discovered. An electrical panel that cannot support three-phase supply. A drain that sits exactly where a leg needs to go. A corridor that is 50 mm too narrow for the unit on its pallet. Each of these is fixable, but fixing them after the oven has arrived costs money, delays service, and creates pressure that leads to shortcuts.
The manufacturers whose manuals underpin this guide — Rational, Unox, Alto-Shaam — all assume the site is ready when the installer arrives. They write their installation instructions for a prepared environment. What they cannot account for is the gap between what a site manager thinks is ready and what an installer finds on the day.
A pre-purchase site survey, done by someone who has installed combi ovens before, closes that gap. It is not a formality. It is the single step that separates a one-day installation from a two-week renovation.
Ready to order, install, and get cooking?
Thecommercialovenstore supplies premium combi ovens from Rational, Unox, and other leading manufacturers, with the full range of installation accessories — drain kits, water filters, oven stands, and approved flexible hoses — available alongside every oven order. Rather than sourcing equipment and installation separately, you can handle both in one place.
The team offers two-engineer professional installation visits with commissioning support and warranty activation, so the paperwork is correct from day one. For buyers who want to manage cash flow, iwocaPay flexible payment options are available at checkout, letting you spread the combined cost of the oven and installation rather than absorbing it upfront. Visit Thecommercialovenstore to browse the full range, request a site survey, or book an installation.
Useful sources for installers and site managers
The documents below are the primary references installers will consult on site. Save or forward them to your installation team before the job begins.
- Rational iCombi installation manual: Covers electrical ratings, water specifications, clearance requirements, and commissioning steps for Rational combi models. The definitive reference for any Rational installation in the UK.
- Alto-Shaam combi installation guide: Practical field guidance on site preparation, utility positioning, and common installation pitfalls from Alto-Shaam’s technical team.
- Fermag site-preparation article: The most cited field-level resource on utility proximity, drain placement, and hose specification. Useful for site managers preparing a checklist.
- Fisher & Paykel combi-steam installation guide: Step-by-step unpacking, positioning, and electrical connection instructions with a pre-installation checklist.
- Atosa AEC series operations manual: Sets out mandatory clearance, levelling, and water quality requirements; includes the warranty implications of non-compliant installation.
- Miele combi-steam installation instructions: Covers qualified technician requirements, electrical connection standards, and safety interlock checks.
- Henny Penny drain installation guidance: Specifies drain diameters by oven size (1.5" to 2.5") and explains air-gap and fall requirements for combi drain connections.