

Run the oven’s automatic clean cycle at the end of every service, then follow with a quick manual wipe of the door seals, trays and condensate tray. That two-part routine, done consistently, is what keeps a combi oven hygienic, efficient and compliant with HACCP records.
Before you touch anything, let the oven cool. Standard combi oven cleaning procedures specify cooling below 60°C before any manual contact, and most manufacturers set the threshold lower still. Electrical isolation before manual cleaning is non-negotiable.
Immediate action checklist:
- Allow the oven to cool to below 60°C (check your model’s manual for the exact threshold)
- Isolate the power supply before opening the oven for manual work
- Put on chemical-resistant gloves and eye protection before handling any cleaning agent
- Select the appropriate auto-clean cycle level for the day’s soil load and start it
- Once the cycle completes, remove racks and trays and wipe door seals with a damp cloth
- Log the cleaning action, operator name and date in your HACCP record
Safety first: Never start manual cleaning on a hot oven. Steam and caustic cleaner residue on hot surfaces create a burn and chemical-exposure risk. If the oven has been running heavy roasting or baking cycles, allow at least 30 minutes’ cool-down before opening.
Key takeaways
Consistent combi oven cleaning requires a daily auto-clean cycle, a brief manual wipe of seals and trays, manufacturer-approved consumables, scheduled descaling, and a HACCP log completed after every clean.
| Point | Details |
|---|---|
| Daily auto-clean is non-negotiable | Run the cycle at the correct level after every service; log the action with operator name and date. |
| Use manufacturer-approved products only | Rational cleaning tabs, Unox-approved detergents and commercial cleaners like Evans Vanodine are formulated for combi cavities; domestic sprays damage seals and sensors. |
| Descale on a schedule | Frequency depends on water hardness; hard-water areas may require deliming more frequently; always use the manufacturer’s approved deliming agent. |
| COSHH and PPE are legal requirements | Complete a COSHH risk assessment for every cleaning chemical, keep SDS accessible, and wear chemical-resistant gloves, goggles and an apron. |
| Thecommercialovenstore stocks compatible consumables | Cleaning tabs, canisters and spare parts for Rational and Unox models are available with flexible payment options. |
Table of Contents
- How do automatic self-cleaning cycles actually work?
- Step-by-step manual cleaning of the combi oven interior
- Which commercial cleaners should you use, and which should you avoid?
- How to descale your combi oven’s steam system
- Cleaning racks, trays, door glass and gaskets
- COSHH, SDS and PPE: safe chemical handling in UK kitchens
- Practical maintenance schedule and HACCP cleaning log
- Troubleshooting common cleaning problems
- A note from Thecommercialovenstore
- Get manufacturer-approved consumables and parts
- Sources
How do automatic self-cleaning cycles actually work?
Most modern combi ovens, from Rational SelfCookingCenter models to Unox units, offer multiple automatic cleaning levels. The principle is the same across brands: the oven applies hot steam to loosen soiling, dispenses detergent at a controlled dose, runs a wash phase, rinses with clean water, then dries the cavity. The operator’s job is to select the right level and add the consumable when prompted.
Typical cleaning levels run from a light rinse (suitable after a light pastry service) through to a heavy or intensive cycle for a full day of roasting and grilling. Choosing the right level matters. Running a heavy cycle every time wastes chemical and adds unnecessary downtime; running a light cycle after a greasy service leaves residue that bakes on overnight and becomes far harder to shift.
What automatic cycles clean well:
- Interior cavity walls and ceiling
- Fan blades and fan housing (on most models)
- Drain and sump area
- Cooking chamber floor
What they do not fully address:
- Door glass, particularly the inner pane
- Door gaskets and seals
- Condensate and drip trays
- Heavy baked-on carbon deposits that have built up over multiple cycles
- Limescale in the steam generator (this requires a separate deliming process)
Convotherm’s easyTouch system illustrates how touch-screen ovens prompt the operator to add single-dose cleaner and neutraliser at the correct stage, removing the guesswork from dosing. Single-dose systems reduce the risk of under- or over-dosing, which is particularly useful in multi-site operations where staff turnover is high.
Pro Tip: Match the cleaning level to the actual soil load rather than defaulting to the heaviest cycle. On a light day, a medium cycle is sufficient and cuts cycle time by 20–30 minutes, reducing both chemical consumption and wear on internal components.
Step-by-step manual cleaning of the combi oven interior
The correct sequence is: cool down, isolate power, remove parts, apply cleaner, dwell, agitate, rinse, dry, log. Skipping any step, particularly the cool-down or the rinse, creates either a safety hazard or a residue problem that compounds over time.
- Cool the oven to below 60°C. Most manufacturers specify this threshold; some recommend waiting until the cavity is at room temperature for a thorough clean. Do not rush this step.
- Isolate the power supply at the isolator switch before opening the door for manual work.
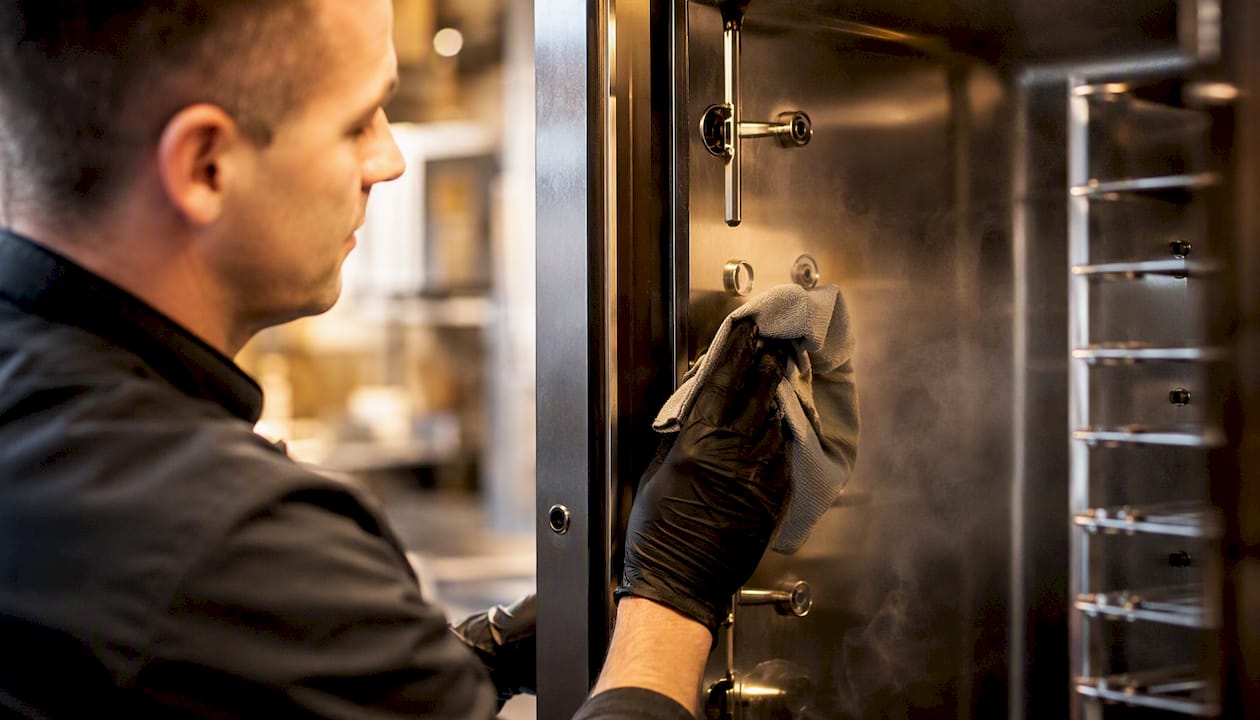
- Put on PPE: chemical-resistant gloves (nitrile or neoprene), safety goggles or a face shield, and a waterproof apron.
- Remove all racks, trays and the condensate tray. Set them aside for separate cleaning.
- Remove loose debris from the cavity floor with a soft brush or damp cloth. Do not use abrasive scourers on stainless steel surfaces.
- Apply an approved commercial combi oven cleaner at the manufacturer’s recommended dilution. Spray or wipe onto interior surfaces, avoiding sensors, probes and the fan motor housing. Follow the dwell time stated on the product’s Safety Data Sheet (SDS), typically 5–15 minutes.
- Agitate with a soft nylon brush or non-scratch pad. Work from top to bottom so loosened soiling falls to the floor of the cavity rather than onto already-cleaned surfaces.
- Rinse thoroughly with clean water, ensuring no detergent residue remains. Residue left on surfaces can taint food and damage seals over time.
- Dry the interior with a clean cloth or allow the oven’s drying cycle to run.
- Refit all parts and check that racks are seated correctly and the condensate tray is properly positioned.
- Log the cleaning action in your HACCP record: date, operator name, cleaning product used, and any observations (damage, unusual soiling, etc.).
Do not use domestic oven cleaners or dishwasher tablets. Manufacturers including Rational and Unox explicitly warn against these products. Domestic sprays contain caustic concentrations and foaming agents not designed for combi oven cavities; they can damage seals, sensors and internal finishes, and the residue is difficult to rinse out completely.
Pro Tip: Pay particular attention to the area around temperature probes and humidity sensors. Aggressive scrubbing near these components can knock them out of calibration. Use a soft damp cloth only in those areas, and never spray cleaner directly onto a probe.
Which commercial cleaners should you use, and which should you avoid?
Prefer manufacturer-approved consumables where they exist for your model. For Rational SelfCookingCenter and CombiMaster Plus units, Rational’s own cleaning tabs are formulated specifically for those models and are the safest choice for compatibility. For Unox ovens, follow Unox’s own guidance on approved detergents; their CHEFTOP and BAKERTOP ranges have specific recommendations in the operator manual.
For general commercial use, Evans Vanodine’s combi oven cleaner is a widely used UK option: a high-activity, low-foaming alkaline detergent formulated to cut baked-on grease in combi oven cavities. Always consult the SDS before use.
What to avoid:
- Domestic oven sprays (wrong pH, excessive foam, damaging to seals)
- Dishwasher tablets (not formulated for combi cavities; residue risk)
- Abrasive powders or steel wool (scratch stainless steel, harbour bacteria)
- Bleach-based products (can corrode stainless steel and damage gaskets)
Always store cleaning chemicals in a locked, ventilated cabinet away from food storage areas. Follow the dilution instructions on the SDS precisely; stronger is not better and increases both chemical cost and rinse burden.
How to descale your combi oven’s steam system
Descaling frequency depends on your local water hardness and how intensively you use the steam function. In hard-water areas of the UK, such as much of the South East and East of England, limescale builds up faster and may require deliming every one to two weeks. In softer-water regions, monthly deliming may suffice. The manufacturer’s manual will state the recommended interval; record every descaling action in your maintenance log.
Parts Town’s combi oven maintenance guidance confirms that deliming is a distinct task from general cleaning and should follow manufacturer-specified intervals based on water hardness and usage patterns.
Deliming procedure (general steps — always follow your model’s specific instructions):
- Isolate the oven and allow it to cool fully before starting
- Use only the manufacturer-approved deliming agent for your model; never substitute a generic descaler without confirming compatibility
- Add the deliming agent at the concentration stated in the product’s SDS
- Run the deliming cycle as directed; do not interrupt it mid-cycle
- Flush the water circuit thoroughly with clean water after the cycle completes
- Check the drain for limescale debris and clear if necessary
- Log the date, product used and any observations
Pro Tip: Fit a water softener or inline filter appropriate for your local water hardness. Treated water reduces limescale accumulation significantly, extends the interval between deliming cycles and protects the steam generator from premature failure. Your oven supplier or a water-treatment specialist can advise on the right specification for your supply.
If you notice reduced steam output, longer heat-up times or error codes related to the water circuit, call your authorised service engineer rather than increasing the deliming frequency. These symptoms can indicate a failing heating element or a blocked injector that descaling alone will not fix.
Cleaning racks, trays, door glass and gaskets
Removable parts accumulate grease and food residue that the auto-clean cycle does not fully reach. Remove them after every service, soak in an approved commercial detergent solution, agitate with a soft brush, rinse thoroughly and allow to air-dry before refitting. Log the action.
Door glass: Many combi ovens have a multi-pane door with an inner glass panel that can be opened for cleaning. Consult your model’s manual before attempting to open the inner pane; the hinge mechanism varies. Clean both faces of the inner glass with a non-scratch cloth and a diluted alkaline cleaner, then rinse and dry. Streaks on the glass after cleaning are usually caused by detergent residue; a second rinse with clean water resolves this.
Gaskets and door seals: Use a soft damp cloth with a mild detergent solution. Never use abrasive tools or high-concentration alkaline cleaners on rubber or silicone gaskets; these materials degrade quickly under chemical attack, and a damaged gasket allows steam to escape, reducing cooking efficiency and increasing energy consumption.
Condensate and drip trays: Drain completely, wash with hot water and detergent, rinse and dry. These trays collect a mixture of grease, food particles and condensate water, making them a significant hygiene risk if left uncleaned.
Inspection checklist — check at every weekly clean:
- Gaskets: look for tears, splits, hardening or areas that no longer seat flush against the door frame
- Racks and trays: check for warping, corrosion or damaged coatings that could contaminate food
- Condensate tray: check the drain outlet is clear and the tray is not cracked
- Door hinges: check for smooth operation; a stiff hinge puts stress on the gasket
Replace damaged gaskets promptly. A torn seal is not just an efficiency problem; it is a food safety risk and will cause the oven to fail a hygiene inspection.
COSHH, SDS and PPE: safe chemical handling in UK kitchens
Any commercial cleaner used in a UK kitchen falls under the Control of Substances Hazardous to Health (COSHH) Regulations 2002. Complete a COSHH risk assessment for every cleaning chemical you use and keep the relevant Safety Data Sheet (SDS) accessible to all staff who handle the product. The Evans Vanodine combi oven cleaner datasheet is a good example of the information an SDS provides: first-aid measures, spill response, disposal instructions and storage requirements.
Minimum PPE for typical combi oven cleaners:
- Chemical-resistant gloves (nitrile or neoprene, minimum 0.3 mm thickness for alkaline cleaners)
- Safety goggles or a full face shield (not standard safety glasses, which do not protect against splashes)
- Waterproof apron or chemical-resistant overalls
- Closed-toe, non-slip footwear
Ventilate the kitchen during and after cleaning. Open extraction hoods and, where possible, a window or door. Concentrated alkaline vapours are an irritant to the respiratory tract; good airflow reduces exposure.
SDS action items every operator should know:
- First aid: if cleaner contacts eyes, irrigate with water for at least 15 minutes and seek medical attention; keep an eyewash station within reach of the oven
- Spill response: absorb with inert material (sand or vermiculite), do not wash into drains without dilution; neutralise if the SDS specifies
- Disposal: follow local hazardous-waste rules; do not pour concentrated cleaner down the drain; diluted rinse water from a properly run cycle is generally acceptable, but confirm with your local authority
- Storage: locked, ventilated cabinet, away from food and food-contact surfaces
HACCP records and COSHH records are separate documents, but they reinforce each other. A cleaning log that records the product used, dilution and operator name satisfies both the food-safety audit and the COSHH requirement to demonstrate safe use.
Pro Tip: Laminate a one-page SDS summary for each cleaning product and fix it to the inside of the chemical storage cabinet door. Staff can check first-aid and spill procedures without hunting for the full document during an incident.
Practical maintenance schedule and HACCP cleaning log
A consistent schedule is what separates kitchens that pass audits from those that scramble before inspection. The schedule below covers the core tasks; always supplement it with your oven manufacturer’s model-specific intervals.
- Daily: Run the auto-clean cycle at the appropriate level after the last service. Wipe door seals, condensate tray and exterior surfaces. Log the action.
- Weekly: Remove and deep-clean all racks, trays and the condensate tray. Clean door glass (both panes). Inspect gaskets and seals. Check and clear the drain outlet. Log all actions and note any damage observed.
- Monthly: Carry out a full manual interior clean. Check and clean the air filter (if fitted). Review the deliming log and carry out descaling if due. Inspect hinges and door closure. Log all actions.
- Quarterly: Full service inspection, ideally by an authorised engineer. Check water-treatment equipment. Review cleaning product stock and SDS currency. Update COSHH risk assessments if products have changed.
Simple HACCP logging template:
| Date | Operator | Task completed | Product used | Notes / observations |
|---|---|---|---|---|
| DD/MM/YYYY | Name | Auto-clean + seal wipe | Rational cleaning tab | No issues |
| DD/MM/YYYY | Name | Full rack and tray clean | Evans Vanodine diluted 1:10 | Minor gasket wear noted, reported to manager |
Pro Tip: Store digital photos of any damage or unusual soiling alongside your written log. A timestamped photo is far more persuasive to an auditor or service engineer than a written note, and it creates a clear record of when a problem first appeared.
For broader operational efficiency in hospitality kitchens, a structured food service workflow approach can help integrate cleaning schedules into the wider kitchen routine without disrupting service.
Troubleshooting common cleaning problems
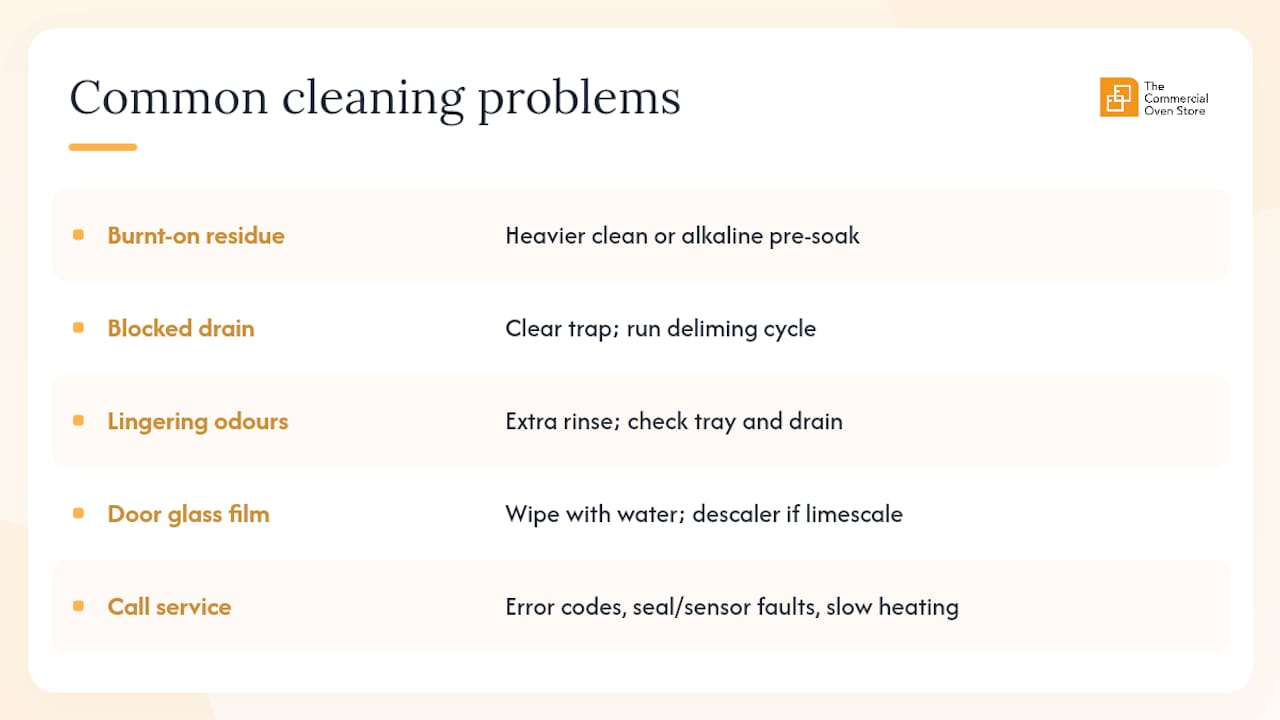
Burnt-on residue that won’t shift after an auto-clean cycle: Run a heavier cleaning level, or apply a manual pre-soak with an approved alkaline cleaner at the concentration stated on the SDS. Allow the full dwell time before agitating. If residue persists after two cycles, it has likely carbonised and may need a targeted manual clean with a soft nylon brush. Do not use metal scrapers; they scratch the cavity lining and create sites where bacteria can harbour.
Blocked drain: Check the drain trap first; food debris is the most common cause. Remove the trap, clear the blockage, rinse and refit. If the drain remains slow after clearing the trap, run a deliming cycle, as limescale can partially block the drain outlet. Persistent blockages warrant a service call.
Lingering odours after cleaning: Usually caused by detergent residue or food debris in hard-to-reach areas such as the fan housing or drain sump. Run an additional rinse cycle, then check the condensate tray and drain. If the smell persists, it may indicate a build-up behind the fan baffle; this requires a service engineer to access safely.
Streaks or film on the door glass: Almost always a rinsing issue. Wipe the glass with a clean cloth dampened with plain water and dry immediately. If the film is persistent, it may be limescale from steam condensation; a diluted food-safe descaler applied with a cloth and rinsed thoroughly will remove it.
Pro Tip: After any aggressive manual clean, run a short steam cycle with no food in the oven before the next service. This flushes residual cleaner from the cavity and confirms the oven is heating and steaming correctly before you put food in.
When to stop and call a service engineer: If you notice error codes after cleaning, the door does not seal properly, the oven takes significantly longer to reach temperature, or you suspect a sensor has been displaced, stop using the oven and call an authorised engineer. Electrical faults following cleaning, though rare, can result from water ingress near control components; do not attempt to diagnose these yourself.
A note from Thecommercialovenstore
At Thecommercialovenstore, the most common mistake we see from operators is treating the auto-clean cycle as the whole job. It is an excellent tool, but the door glass, gaskets and condensate tray still need hands-on attention every day. The Rational i-Combi Pro and Unox CHEFTOP ranges we stock are built to last well over a decade with proper care; we have seen the same units in service for fifteen years in well-run kitchens. We stock manufacturer-compatible cleaning tabs, canisters and spare parts, and our team can point you to the right consumable for your specific model. If you need authorised service contacts or advice on replacement gaskets and filters, get in touch directly.
Get manufacturer-approved consumables and parts
Keeping the right cleaning products in stock is as important as the cleaning routine itself. Thecommercialovenstore supplies manufacturer-compatible cleaning tabs, alkaline canisters and replacement parts for Rational and Unox combi ovens, with flexible payment options through iwocaPay so you can manage purchases alongside your other kitchen costs.
Whether you need Rational cleaning tabs for a SelfCookingCenter, a replacement gasket, or guidance on the right descaler for your water hardness, the team at Thecommercialovenstore can help. Visit Thecommercialovenstore to browse the full range of commercial ovens and compatible accessories, or contact us for model-specific advice. Orders can be placed online with next-day delivery options on stocked items.
Sources
Consult your oven manufacturer’s documentation first for model-specific procedures, approved consumables and deliming intervals. The sources below are the primary references for the guidance in this article.
- Combi Oven Cleaner
- How Automatic Cleaning Extends the Life of Your …
- How to Clean a Convotherm Combi Oven | Parts Town
How to use these sources: Download and store the SDS for every cleaning product you use. Keep a printed copy in the chemical storage area and a digital copy in your HACCP folder. When a new model arrives in your kitchen, download the manufacturer’s cleaning and maintenance guide before the first service and add the model-specific deliming interval to your maintenance schedule.