

That single setting covers more ground than any other starting point.
Before you load the oven, run through this checklist:
- Preheat fully. Allow 10–15 minutes for the cabinet to reach target temperature before loading. Cold-loading adds unpredictable time.
- Insert the probe. Place it in the thickest part of the protein, away from bone. Clock time is a guide; probe temperature is the decision.
- Choose your rack position. Middle for most items; lower for thick joints that need longer, gentler heat; upper for finishing and browning.
- Switch to dry heat for the final stage. Drop humidity to 0% for the last 10–15 minutes when you want a browned, crisp exterior.
Key takeaways
Probe-led cooking at the correct humidity setting produces more consistent results than any fixed time chart, and it is the single most important habit to build when using a combi oven.
| Point | Details |
|---|---|
| Start with Combi mode | Set 180°C, 60% humidity as your default starting point for most roasting and reheating. |
| Probe over clock | Insert the probe into the thickest part and cook to the target core temperature, not a fixed time. |
| Preheat every time | Allow 10–15 minutes for the cabinet to reach temperature before loading food. |
| Adjust for load size | Add 10–20% to baseline time for full multi-rack loads and space trays for airflow. |
| Hit 75°C for poultry | All poultry must reach 75°C at the core; confirm with a probe after resting. |
Manufacturer charts and useful resources
- Rational — operational guidance on mode selection, preset logic, and multi-rack cooking; the primary reference for Rational iCombi Pro users.
- Rational culinary school handbook — detailed temperature/time relationships, probe techniques, and professional cooking charts; best for understanding the science behind the settings.
- V-ZUG combi oven manual — specific time and temperature tables for vegetables, meats, and bakery items, including frozen vs fresh distinctions.
- Gaggenau combi steam oven basics — practical guidance on converting conventional recipes to convection settings and using the core probe accurately.
Table of Contents
- What are the combi oven cooking times for common foods?
- Which combi mode should you choose, and what does humidity percentage do?
- How does preheat and oven load affect your cooking times?
- How do you adapt cooking times for weight and frozen products?
- What are the UK food safety internal temperature targets?
- Should you use manufacturer presets or programme manually?
- How do you bake bread and pastries in a combi oven?
- How do you fix soggy bases, over-browning, and uneven cooking?
- Why charts are a starting point, not a finish line
- Sources
What are the combi oven cooking times for common foods?
The table below gives starting-point settings drawn from manufacturer guidance, including Rational and V-ZUG combi oven charts, which specify steam cooking for many vegetables at 100°C and professional baking at 200–220°C. Treat these as calibrated starting points, not absolutes — your specific oven, load size, and product thickness will all shift the result.
| Food category | Mode | Cabinet temp (°C) | Typical time | Core/internal target |
|---|---|---|---|---|
| Whole chicken | Combi | 180 | 60–70 min | 75°C |
| Chicken portions | Combi | 170 | 25 min | 75°C |
| Whole turkey (5 kg) | Combi | 160 | 3 hours | 75°C |
| Beef joint (per 500 g) | Combi | 160–180 | 20 min per 500 g | 60°C (medium) |
| Pork loin (per 500 g) | Combi | 170 | 20 min per 500 g | 75°C |
| Lamb shoulder (per 500 g) | Combi | 160 | 20 min per 500 g | 70°C |
| Salmon fillet | Steam | 80–100 | 10–15 minutes | 60°C |
| White fish fillet | Steam | 80–100 | 10–15 minutes | 60°C |
| Root vegetables (chunks) | Steam | 100 | 20–30 min | Tender |
| Broccoli / green veg | Steam | 100 | 6–10 min | Tender-crisp |
| Artisan bread loaf | Combi/Conv | 220 then 200 | 5 minute steam plus target time | Golden crust |
| Croissants / pastries | Convection | 170–185 | 20 minutes | Golden |
| Frozen chips / sides | Combi | 200 | +additional time versus fresh | Crisp |
| Reheated ready meals | Steam | 100 | 10–15 minutes | 75°C throughout |
Weight-based rule of thumb: for whole birds and joints, use a general time per unit weight at 170–180°C in Combi mode, then add a 10-minute dry-heat finish at 200°C for colour.
A note on temperature and time: there is an inverse relationship between cabinet temperature and cooking time. The Rational culinary school handbook illustrates this clearly: a chicken breast may cook much faster at higher temperatures but requires longer at lower temperatures, with different finishing behaviour at each temperature. Higher heat is faster, but caramelisation and colour often need a separate finishing step.
Which combi mode should you choose, and what does humidity percentage do?
Rational’s guidance frames effective combi operation as three steps: choose the correct mode, set temperature and humidity, and preheat. Getting the mode right is where most cooks go wrong first.
It cooks gently and evenly, but produces no browning at all.
According to Island Catering’s combi oven guide, convection typically reduces roasting times by roughly 15% compared with a standard oven, and it is the right choice for pastries, crisping, and searing. When converting a conventional recipe to convection, Gaggenau’s combi steam oven guidance recommends reducing the set temperature by around 10–15% to avoid over-browning.
This is the workhorse mode for roasting meats, baking bread, and cooking mixed loads. Humidity percentage controls the balance:
- 0%: pure dry heat, maximum browning and crisping
- 30%: light moisture, good for roasting poultry with some colour
- 60%: balanced, suits most meat roasting and reheating
- 80–100%: high moisture, close to steam, ideal for delicate proteins and slow braises
The sustained moisture breaks down collagen without drying the meat. Many professional kitchens programme this overnight and arrive to finished product.*
You get the yield benefit of moist cooking and the visual finish of dry roasting.
How does preheat and oven load affect your cooking times?
Preheat is not optional. Loading food into a cold or partially heated cabinet means the first 10–15 minutes of your programmed time are spent heating the oven, not cooking the food. The result is uneven cooking and unreliable times. Always allow the cabinet to reach target temperature before the door opens.
Rack positions matter more than most cooks expect:
- Top rack: finishing, browning, pastries, items that need direct top heat
- Middle rack: default position for most proteins and baked goods
- Lower rack: thick joints, slow braises, anything needing longer, gentler heat from below
For multi-rack loads, Rational’s operational guidance confirms that combi ovens can handle simultaneous multi-rack cooking without flavour transfer between items.
A quick staging checklist for multi-rack service:
- Load heaviest, longest-cooking items first on lower racks
- Space trays at least one runner apart
- Rotate trays front-to-back at the halfway point if your oven lacks uniform fan distribution
- Never open the door more than necessary; each opening drops cabinet temperature and adds time
Pro Tip: *If you are cooking a mixed load (e.g. chicken portions and root vegetables together), cut the vegetables into smaller pieces so they finish at the same time as the protein.
How do you adapt cooking times for weight and frozen products?
Use probe targets over clock time whenever precision matters. The Rational technology handbook is clear on this: probe-led cooking accounts for load size, starting temperature, and joint shape in a way that fixed times simply cannot. Probe programmes reduce waste and shrinkage in meat cookery and are standard practice in professional kitchens.
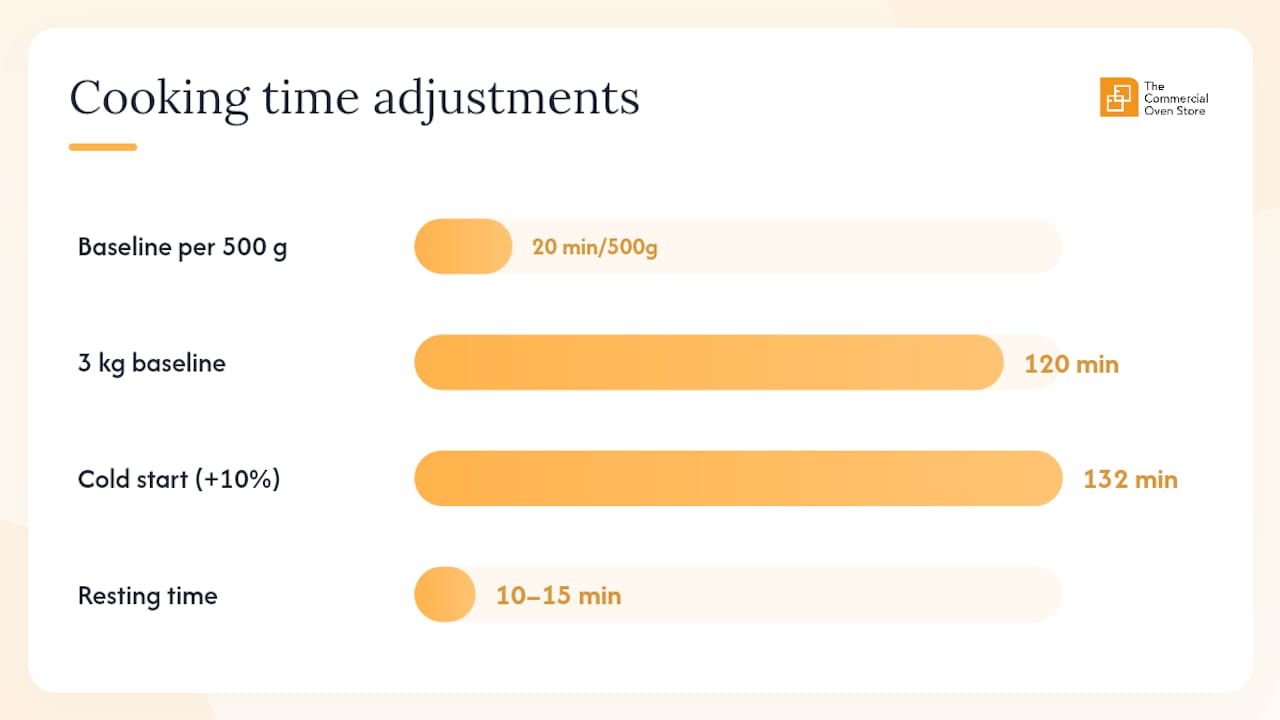
Scaling times by weight — a worked example:
- Take your baseline time from the chart (e.g. 20 minutes per 500 g for a beef joint at 170°C Combi).
- Weigh the joint. A 3 kg joint = 6 × 500 g = 6 × 20 minutes = 120 minutes baseline.
- Add 10% for a cold-from-fridge start: 120 + 12 = 132 minutes.
- Insert the probe and set the target core temperature (60°C for medium beef). The oven stops or alerts when the probe reads that temperature, regardless of clock time.
- Rest the joint for 10–15 minutes before carving. Carryover cooking will raise the core by a further 2–5°C during rest.
For frozen items, manufacturer charts specify longer times or a defrost step first. As a general rule, add a longer time to the fresh time, or run a dedicated defrost programme at 60–70°C steam before switching to the cooking programme. Frozen fish fillets and convenience foods are particularly sensitive to uneven thawing, so a defrost step produces more consistent results than simply extending cook time.
Probe placement: insert into the geometric centre of the thickest part. For poultry, that is the inner thigh, not the breast. For fish, aim for the centre of the thickest fillet. For small pieces where a probe is impractical, use the visual and texture checks described in this guide to knowing when biscuits and cakes are ideally baked as a reference for applying similar doneness logic to savoury items.
What are the UK food safety internal temperature targets?
The UK Food Standards Agency sets the benchmark: food must reach a safe internal temperature and be held there long enough to destroy harmful bacteria. For practical kitchen use, the targets below are the ones to work from.
Poultry (chicken, turkey, duck) must reach 75°C at the core. This is the single most critical target in any kitchen. There are no exceptions for resting time or colour.
| Protein | Minimum internal temperature |
|---|---|
| Poultry (all) | 75°C |
| Pork | 75°C |
| Beef / lamb (whole joints) | 60°C (medium) / 70°C (well done) |
| Minced meat / burgers | 75°C |
| Fish | 60°C |
| Reheated food (any) | 75°C throughout |
Resting times and carryover cooking: resting is not just about juiciness. During a 10–15 minute rest, the core temperature of a large joint continues to rise due to residual heat distribution. For poultry, this means you can pull the bird at 72–73°C and it will reach 75°C during rest. For beef, pulling at 57–58°C gives you a medium result after resting. Always confirm with a probe after resting, not before.
A probe is also a legal safeguard. If a food safety inspection queries a cook temperature, a logged probe reading is your evidence. Many commercial combi ovens, including the Rational i Combi Pro 10 GN1/1, log HACCP data automatically.
Should you use manufacturer presets or programme manually?
Automatic presets are the fastest route to consistent results, particularly when you are learning a new oven or running a high-volume service. Manufacturer presets on units from Rational and Unox select humidity ratios, temperature curves, and time ranges automatically based on the food category you select. Common preset categories include poultry, fish, bakery, and vegetables, with sub-options for weight or portion size.
The practical advice is to start with presets, then adjust them:
- Run the preset as supplied for the first two or three batches
- Note where the result differs from your target (too pale, slightly dry, undercooked centre)
- Make one adjustment at a time: humidity first, then temperature, then time
- Record your adjusted settings as a named programme so the whole team uses the same parameters
When to switch to manual:
- Unusual load sizes or shapes that fall outside the preset’s weight range
- Recipe-specific requirements (a specific crust colour, a particular texture)
- Probe-led cooking where you want the oven to stop at a precise core temperature rather than a fixed time
- Overnight or long low-temperature cycles where the preset’s time window is too short
Translating a preset into manual settings is straightforward: run the preset once with the door slightly ajar at the start to observe the initial humidity and temperature the oven selects, then replicate those parameters manually. Most Rational and Unox units display the active humidity percentage and cabinet temperature during a preset run.
Pro Tip: Start with manufacturer presets to learn the oven’s behaviour, then record small adjustments per your recipes and load types to build site-specific charts. This is the fastest route to consistent results across an entire team.
How do you bake bread and pastries in a combi oven?
The sequence matters more than any single temperature. For artisan loaves, Island Catering’s combi guide recommends starting with a five-minute burst of 100% steam to maximise oven spring, then switching to convection for colour and crust development.
Practical bread sequence:
- Preheat to 220°C, Combi mode, 100% humidity
- Load scored loaves and run 5 minutes at full steam
- Drop humidity to 20–30%, maintain 220°C for 15 minutes
- Reduce to 200°C, 0% humidity for a final 10–15 minutes to set the crust
For croissants and laminated pastries, skip the steam entirely. For a convection oven for bakery setup, the same principle applies: dry heat is the friend of laminated dough.
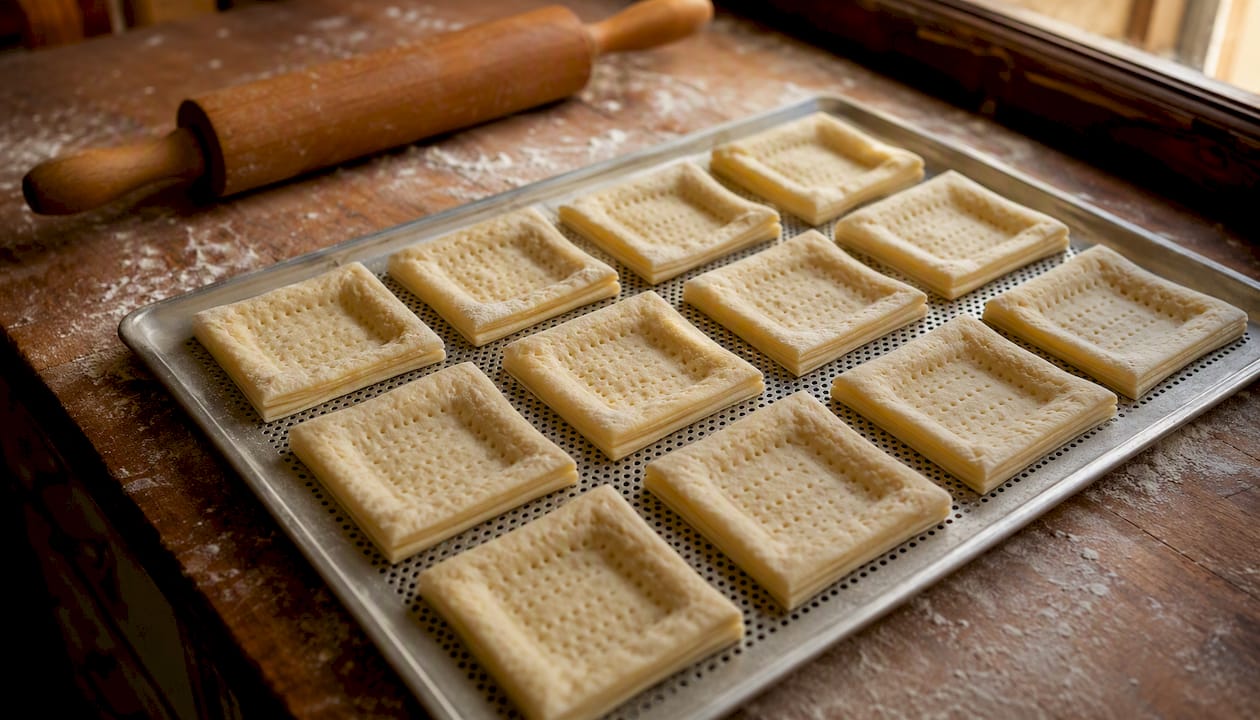
Pro Tip: Dock puff pastry bases before loading and use a perforated tray rather than a solid one. The airflow underneath prevents the soggy base that trapped steam causes. A perforated aluminium pan GN1/1 is the simplest fix for this.
A sponge that bakes at 180°C in a still oven typically needs 160–165°C in convection. Check doneness using the skewer test and the visual cues covered in practical tips for baking cakes.
How do you fix soggy bases, over-browning, and uneven cooking?
Most combi oven problems trace back to one of four causes: wrong humidity, overcrowding, skipped preheat, or incorrect rack position. The fixes are quick once you know which one applies.
Soggy base:
- Cause: too much humidity, solid tray trapping steam underneath
- Fix: switch to a perforated tray, reduce humidity by 20%, or finish with 5 minutes at 0% humidity
Over-browning or burnt edges:
- Cause: temperature too high, humidity too low, or item placed too close to the top element
- Fix: reduce cabinet temperature by 10–15°C, increase humidity to 30–40%, move to middle rack
Uneven cooking across the load:
- Cause: overcrowding, insufficient airflow, or uneven tray spacing
- Fix: reduce the number of trays, rotate front-to-back at the halfway point, space trays at least one runner apart
Dry or shrunken meat:
- Cause: humidity too low for the cooking time, or temperature too high
- Fix: increase humidity to 60–80% for the main cook phase, reduce cabinet temperature by 10°C, and use probe-led cooking to avoid overcooking
Undercooked centre with browned exterior:
- Cause: temperature too high, cooking too fast on the outside before heat penetrates
- Fix: reduce cabinet temperature by 20°C, increase humidity to slow surface cooking, and rely on the probe rather than the clock
Cleaning and maintenance note: a dirty oven affects performance. Steam generator scale, blocked drain, or grease on the fan impeller all reduce heat transfer efficiency and alter humidity delivery. Follow the manufacturer’s cleaning cycle after every service. Rational and Unox units have automatic cleaning programmes; skipping them leads to inconsistent results that no amount of time adjustment will fix.
Why charts are a starting point, not a finish line
Charts and presets give you a calibrated starting point, and that is genuinely useful. But the cooks who get the most consistent results are the ones who treat those numbers as a hypothesis to test, not a guarantee to trust.
The real skill in combi oven cooking is learning to read the oven you are standing in front of. Two units of the same model, installed in different kitchens, with different water hardness, different ventilation, and different load patterns, will behave differently. The probe is what closes that gap. Once you have a probe reading you trust, you can work backwards to refine your time and humidity settings for your specific kitchen.
Thecommercialovenstore stocks Rational and Unox units, including the Rational i Combi Pro 10 GN1/1, which includes built-in probe programmes and HACCP logging. If you are commissioning a new unit, the combi oven installation guide covers site readiness and setup in detail.
Sources
- Rational - Home
- Rational culinary school handbook (technology handbook)
- Gaggenau — combi steam oven basics
- V-ZUG combi oven manual (export)
Recommended
- Combi oven installation: the UK site-readiness guide – thecommercialovenstore.com
- The Ultimate Kitchen Companion: Unox Combi Ovens – thecommercialovenstore.com
- Convection oven for bakery: the UK buyer’s guide – thecommercialovenstore.com
- Speed oven vs microwave: which should your kitchen buy? – thecommercialovenstore.com