

Install a gravity drain of the correct diameter and a temperature-rated material, set a proper fall, and fit a vent or air gap to stop vapour lock. Only add a waste pump where gravity discharge genuinely is not possible. Combi oven drain requirements come down to four things that manufacturers rarely compromise on:
- Diameter: matched to oven size, commonly varying with oven capacity
- Material: stainless steel, copper, or pipe rated for at least 60 to 80°C
- Fall: a minimum gradient, commonly around 5%
- Venting: an air gap or vent where the drain feeds a closed system with a building trap
Get any one of these wrong and you’re looking at flow restriction, water damage, or a service call within months rather than years.
Key Takeaways
Correct combi oven drain requirements depend on matching diameter, temperature-rated material, and gradient to the specific oven model, with venting fitted wherever vapour lock risk exists.
| Point | Details |
|---|---|
| Match diameter to oven size | Table-top units need around 1.5", 6 to 10 pan ovens around 2", larger models 2.5" or above. |
| Use temperature-rated materials | Choose stainless steel, copper, or rated hose; standard PVC warps under 60 to 80°C discharge. |
| Maintain minimum fall | Set roughly 5% gradient throughout the run, with no uphill sections permitted. |
| Fit venting on closed systems | Add an air gap or vent where the drain feeds a building trap to prevent vapour lock. |
| Verify specs before ordering | Thecommercialovenstore’s site-readiness guide and product pages link to model-specific manuals for exact figures. |
Table of Contents
- What are the drain diameter, material and temperature requirements for combi ovens?
- How should the drain be routed, sloped and connected?
- How do you stop vapour lock in a combi oven drain?
- When does a combi oven need a waste drain pump instead of gravity?
- Practical installation checklist for combi oven drains
- How do you maintain and troubleshoot a combi oven drain?
- What regulations and standards govern combi oven drainage?
- Where to find manufacturer guidance and installation support
- The gap between manufacturer manuals and what installers actually check
- Get the right oven and the right drain setup from one place
- Sources
What are the drain diameter, material and temperature requirements for combi ovens?
Combi oven plumbing specifications scale with the oven, not the kitchen. A compact table-top unit typically needs a drain diameter of around 1.5 inches. Move up to a 6 to 10 pan combi and manufacturers commonly specify 2 inches. Full-size 20 pan ovens often call for 2.5 inches or larger, reflecting the sheer volume of condensate and cleaning water they discharge during a busy service. These figures are examples drawn from manufacturer documentation such as Henny Penny’s FlexFusion installation notes, and the exact figure for your model sits in its own manual, not a generic table.
Discharge temperature is the detail installers most often get wrong. Manufacturers commonly cap drain discharge at 60 to 80°C, and standard PVC has no business anywhere near that heat.
Blodgett’s installation guidance for its BCT and BLCT combi ovens is blunt about what happens otherwise: incorrect materials warp under high-temperature discharge, and a warped pipe restricts flow long before anyone notices a leak. That’s the failure mode nobody budgets for.
Acceptable materials for a compliant drain setup include:
- Stainless steel pipe or fittings
- Copper piping rated for the discharge temperature
- Purpose-made high-temperature flexible hose
- Never standard PVC or push-fit plastic waste pipe rated for domestic use
Some models allow a drain tempering kit or a cold-water mixing point at the drain box, which brings discharge temperature down before it reaches standard building drainage. Check the manual first. Blodgett’s own guidance treats this as manufacturer-permitted, not universal, so fitting a tempering kit without checking compatibility can void a warranty rather than solve a problem.
How should the drain be routed, sloped and connected?
Getting the routing right is where most installation failures actually happen. It’s rarely the pipe itself.
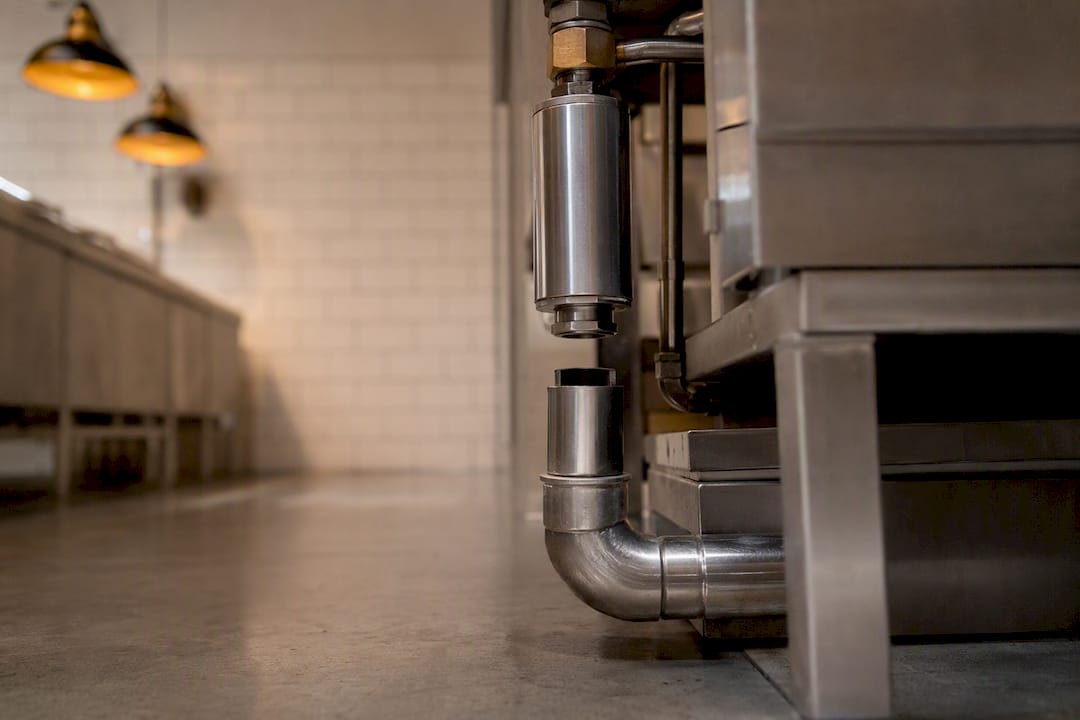
- Set the fall correctly. A minimum gradient of around 5%, roughly a quarter of an inch per foot, is the figure that recurs across installation checklists. Fall short of that and condensate sits in the pipe rather than clearing it, which invites blockages and odour.
- Never route uphill. Eloma’s installation manual for its GeniusMT and Multimax ranges is explicit that waste connections must be installed with a fall throughout, with no uphill sections relying on residual pressure to push water along.
- Keep runs short and secured. Long runs lose fall over distance and give the pipe more chances to sag between fixings. Support brackets at regular intervals stop that sag from creating a false low point that traps water.
- Respect the offset from the oven. Some manufacturers require the drain outlet to sit outside the oven’s own footprint, with minimum and maximum offsets specified, for example Lainox’s guidance on its Naboo range sets a minimum around 300mm and a maximum around 2000mm from the connection point.
- Fit a flexible coupler at the connection. It absorbs minor movement and thermal expansion, and it makes future servicing far easier than a rigid, soldered joint.
- Never site the drain directly under the oven. Rising steam from a drain positioned beneath the unit can affect internal components over time, a warning Blodgett states plainly in its own installation documentation.
How do you stop vapour lock in a combi oven drain?
Vapour lock happens when the oven’s internal siphon and a building trap effectively fight each other over the same air pocket, and the result is restricted flow at exactly the moment the oven needs to clear water fastest. It isn’t a rare fault. It’s a predictable outcome of connecting an oven drain straight into a sealed system with no route for trapped air to escape.
Henny Penny’s service documentation for the FlexFusion range describes vapour locking as a genuine restriction risk, not a cosmetic issue, and warns it can damage the oven’s drain box if left unaddressed.
Watch for these on-site signs that vapour lock is already occurring:
- Water backing up into the oven cavity during a wash cycle
- Gurgling or bubbling noises from the drain during discharge
- Slow clearance even when the slope and diameter both check out
Pro Tip: Run a full water cycle at commissioning, before the kitchen goes live, specifically to test vent effectiveness. It takes ten minutes and it’s the cheapest insurance against a vapour lock callback in month two.
Where the drain discharges into a closed system with an existing building trap, fit a vent or provide an air gap before the connection. It’s the single fix that resolves most vapour lock complaints on site.
When does a combi oven need a waste drain pump instead of gravity?
Gravity drainage is always the preferred combi oven drain requirement, and it should be the default assumption for any new installation. A pump becomes necessary in a narrower set of circumstances than most installers expect.
- There’s no floor drain or waste point close enough to achieve a compliant fall without an impractically long run
- The discharge point sits below the invert level of the nearest drain, so gravity simply cannot move water in the right direction
- The kitchen layout places the oven in a basement, mezzanine, or island position with no natural fall available
Where a pump is genuinely required, match it to the oven’s discharge temperature tolerance, not just its flow rate; a pump rated only for cold water will fail early against sustained hot discharge. Confirm the required head (the vertical lift the pump must overcome) against the manufacturer’s figures, and site the unit somewhere accessible. A pump buried behind fixed cabinetry with no isolation valve turns a five-minute service job into a half-day one.
Practical installation checklist for combi oven drains
Work through this sequence before calling the installation complete.
- Confirm the drain location against the manufacturer’s offset requirements and check it sits outside the oven’s own footprint.
- Verify there’s a suitable floor drain or waste point within a practical run length, and check for adequate service access around it.
- Connect using an approved material, stainless steel, copper, or manufacturer-specified high-temperature hose, never standard plastic waste pipe.
- Set and verify the fall with a spirit level along the full run, not just at the connection point.
- Secure the pipework with brackets at regular intervals to prevent sagging.
- Fit a vent or air gap where the discharge feeds a closed system, or install a pump where gravity discharge isn’t achievable.
- Run a full water cycle to check for leaks, confirm free flow, and test vent effectiveness under real operating conditions.
- Record the installation details, diameter, material, gradient, and any pump specification, for future reference and compliance checks.
Pro Tip: Photograph the completed drain run before boxing it in or fitting a base cabinet. It saves an engineer from guessing what’s behind the panel eighteen months later.
How do you maintain and troubleshoot a combi oven drain?
Routine maintenance is what keeps a correctly installed drain performing years later rather than degrading quietly. Clean strainers and the oven’s own drain box regularly. Food debris and scale build-up here are the most common cause of slow drainage on ovens that were installed correctly in the first place.
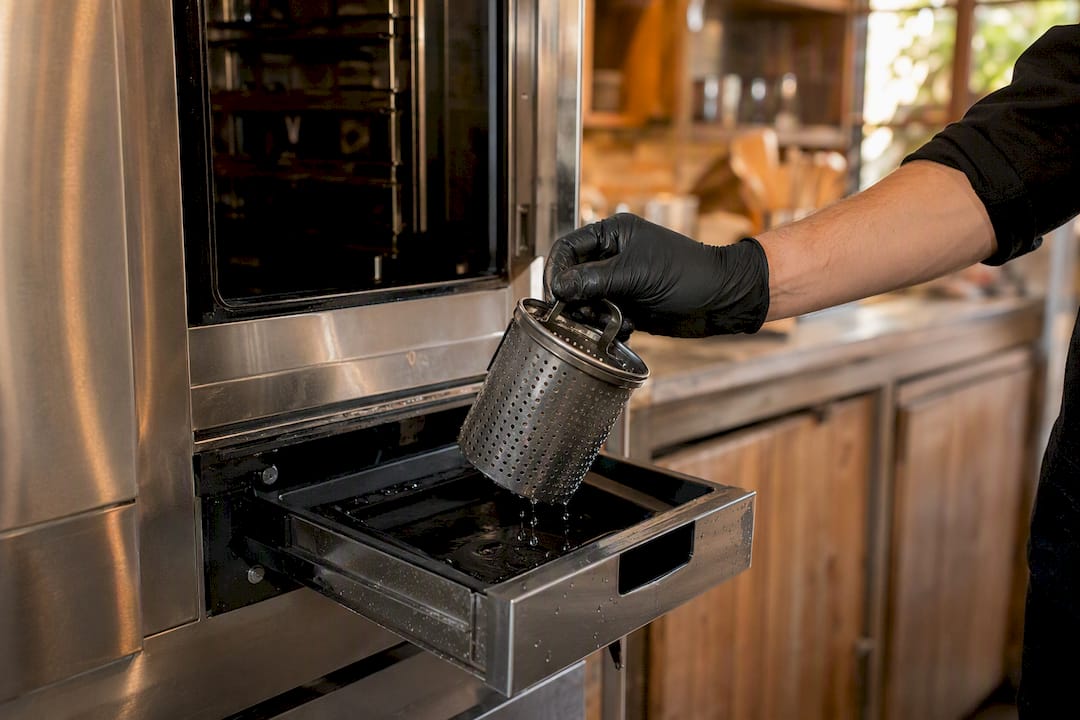
Inspect flexible couplings and support brackets during routine servicing. A coupling that’s perished or a bracket that’s worked loose lets the pipe sag, and a sagging pipe creates a low point that traps water even when the overall gradient is fine.
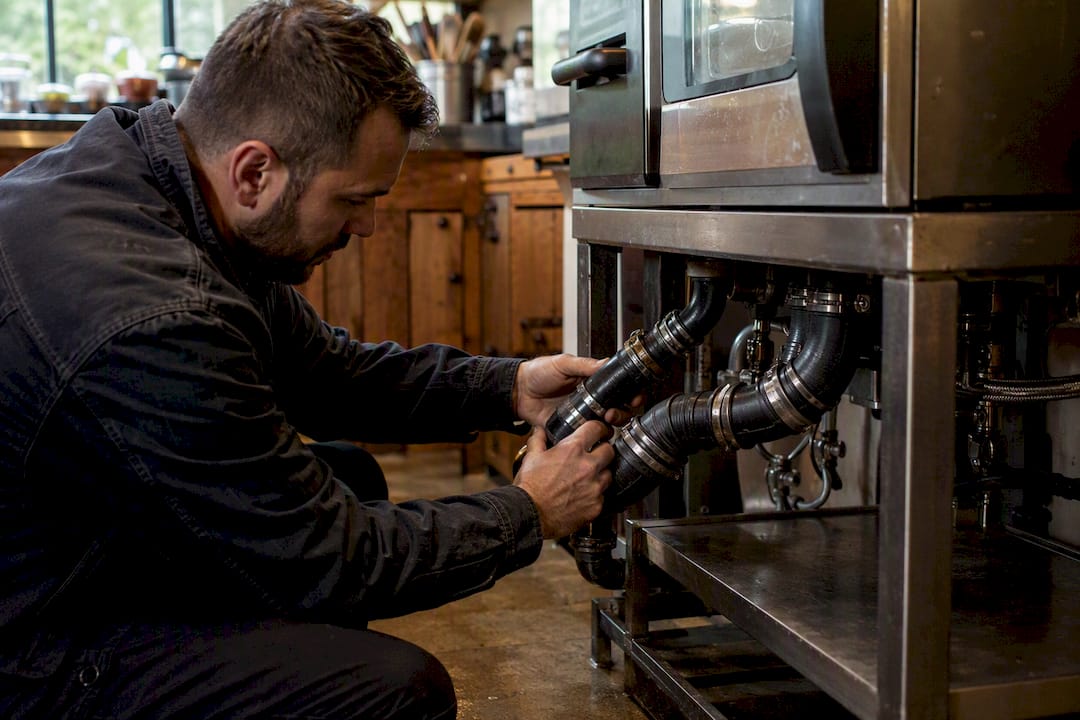
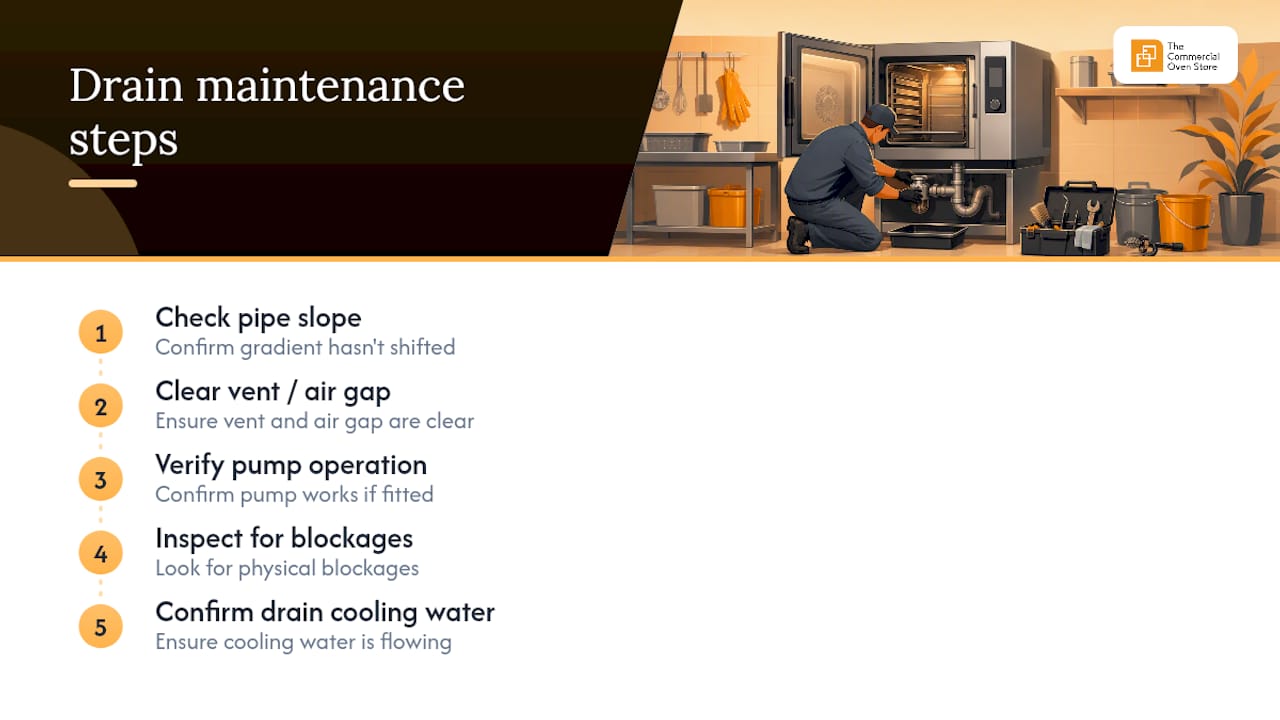
When flow problems appear, work through the same sequence every time: check the slope hasn’t shifted, confirm any vent or air gap is still clear, verify pump operation if fitted, and look for a physical blockage before assuming a bigger fault. Blodgett’s manual also recommends checking that drain box cooling water is still being added as designed, since its absence shortens the life of plastic connectors even when they seem to be coping. Document each service visit; it matters for warranty claims and for compliance records alike.
What regulations and standards govern combi oven drainage?
Every combi oven drain requirement in this article comes from manufacturer installation manuals, and that hierarchy never changes. The manual for your specific model overrides any generic guideline, including anything here, whenever the two conflict.
- Follow the manufacturer’s manual for exact diameter, temperature, and offset figures for that model
- Check local plumbing and building control requirements before installation begins, particularly around waste connections and drainage to trade effluent systems
- Engage a qualified plumbing professional for the connection itself, especially where building control sign-off is required
- Keep installation records, including material specifications and gradient checks, in case building control asks for evidence later
No article, this one included, replaces the manual that ships with your specific oven.
Where to find manufacturer guidance and installation support
Beyond the manuals cited throughout, Thecommercialovenstore’s UK site-readiness guide walks through practical drain planning and service access before delivery day. Product pages such as the Rational i Combi Pro 10 GN1/1 link through to model-specific technical documentation, and compatible bases like the Rational base cabinet for GN1/1 ovens affect drain positioning directly. Contact the team for model-specific clarification before you order pipework.
The gap between manufacturer manuals and what installers actually check
The technical detail in this brief isn’t controversial. Every manufacturer manual referenced here, from Henny Penny to Blodgett to Eloma, agrees on the fundamentals: temperature-rated pipe, a proper fall, correct diameter, and no drain sited under the oven. Where installations still fail, it’s rarely because someone didn’t know the rule. It’s because the rule got applied to the wrong model.
That’s the gap conventional advice glosses over. Generic checklists imply one diameter, one fall, one temperature rating fits every combi oven. It doesn’t. A table-top unit and a 20 pan oven have genuinely different drainage demands, and treating them the same is how installers end up retrofitting a pump six months after a gravity drain that was undersized from day one.
If you take one thing from this brief, make it this: read the model-specific manual before you cut a single length of pipe. The generic figures here tell you what to expect and what questions to ask. They are not a substitute for the numbers stamped on your actual oven’s installation sheet. Get that sequence backwards and you’re paying for the same job twice.
— Simon
Get the right oven and the right drain setup from one place
Thecommercialovenstore doesn’t just sell ovens and leave you to work out the plumbing afterwards. Every combi oven listed comes with access to manufacturer installation documentation, so you’re specifying drain diameter, material, and gradient against the correct figures for that exact model, not a generic estimate. For operators weighing up a new combi purchase, that clarity at the point of sale saves the redesign costs that come from guessing.

If you’re planning an installation now, start with the site-readiness guide to map out drain location and service access before the oven arrives. Browse the current range, including compact options like the CIBO/S countertop fast oven, on Thecommercialovenstore, and speak to the team about flexible payment options through iwocaPay if you’re timing the purchase around cash flow. Get the model confirmed, then get the drain spec right the first time.
Sources
- FlexFusion combi drain install tips (Henny Penny service)
- BCT & BLCT combi oven installation (Blodgett)
- Combi oven installation checklist (WebstaurantStore PDF)
- Naboo - How do you connect the oven drain? (Lainox support)
- Eloma combi oven installation manual (GeniusMT & Multimax)