

Daily wipe-down, weekly deep clean, monthly filter and gasket checks, annual authorised service. That is the cadence every commercial speed oven needs, and it starts with one non-negotiable step: isolate power and allow the unit to cool fully before you touch anything.
Manufacturers including Wolf and Miele are explicit about this in their care documentation, and commercial oven maintenance research suggests a consistent schedule can reduce energy costs and extend equipment life. Neglect it, and you are not just risking a breakdown mid-service; you risk voiding your warranty.
Key takeaways
Consistent speed oven maintenance, starting with daily cleaning and ending with annual authorised service, is the single most effective way to protect equipment life, energy efficiency, and warranty cover.
| Point | Details |
|---|---|
| Daily cleaning is non-negotiable | A ten-minute interior wipe each day prevents grease build-up that forces heating elements to work harder. |
| Isolate power before every task | Always switch off at the mains and allow 30–90 minutes cool-down before cleaning begins. |
| Weekly deep clean protects performance | Remove racks, trays, and turntable; use manufacturer-approved cleaners only; never use abrasive pads or caustic chemicals. |
| Monthly checks catch the costly faults | Inspect door gaskets, clean or replace filters, descale the steam system, and calibrate temperature against a reference thermometer. |
| Thecommercialovenstore supports your upkeep | Parts, accessories, and expert advice for Unox, Rational, and Merrychef speed ovens are available at Thecommercialovenstore. |
Table of Contents
- Before you start: safety, PPE, and prep for professional kitchens
- Which cleaning products and tools are safe for a commercial speed oven?
- How to clean the interior of a commercial speed oven
- How to clean removable parts, the turntable, and the exterior
- Descaling and keeping the steam function working properly
- Troubleshooting common faults and knowing when to call an engineer
- A maintenance schedule you can drop straight into your rota
- What engineers actually see in professional kitchens
- Speed oven parts, service plans, and expert advice from Thecommercialovenstore
- Sources
Before you start: safety, PPE, and prep for professional kitchens
No cleaning task on a commercial speed oven begins without these steps completed in order.
- Isolate power. Switch off at the mains and, where your kitchen uses a lock-off procedure, apply it. Never rely on the unit’s own power button.
- Allow full cool-down. Depending on the model, manufacturers recommend venting the cavity for 30–90 minutes before cleaning begins. Check your OEM manual for the exact figure.
- Ventilate the area. Open extraction or a window. Cleaning products release fumes in a confined space.
- PPE at hand. Heat-resistant gloves, chemical-resistant gloves (for descalers), eye protection, and lint-free cloths should all be within reach before you open the door.
- Protect the work area. Lay down absorbent matting below the unit. Place a “Do Not Use — Cleaning in Progress” sign on the oven and at the pass.
Pro Tip: Photograph the oven’s interior and door seal before each deep clean. A quick phone shot takes seconds and gives you a timestamped record of condition — useful for warranty claims and service triage.
Which cleaning products and tools are safe for a commercial speed oven?
Getting this wrong is expensive. Abrasive pads and caustic chemicals are the two most common causes of avoidable surface damage in professional kitchens.
Safe to use:
- Mild pH-neutral detergent diluted in warm water
- Manufacturer-approved cavity cleaners (check your OEM manual by model number)
- Food-safe descalers approved for stainless steel and coated surfaces
- Soft nylon brushes for baked-on deposits
- Microfibre cloths for wiping and drying
- Soft sponges for glass and door seals
Never use:
- Abrasive scouring pads or steel wool (scratches coated surfaces and glass)
- Oven cleaners containing chlorine or ammonia
- Bleach or strong acids on any coated interior surface
- Pressure washers or excessive water near control housings
As Thermador’s manufacturer guidance confirms, cleaners with chlorine or harsh chemicals damage the cavity finish and should never be used on speed ovens or combination microwave units.
Supplies checklist by task frequency:
| Task | Supplies needed |
|---|---|
| Daily spot clean | Microfibre cloth, mild detergent, warm water |
| Weekly deep clean | Nylon brush, manufacturer-approved cleaner, microfibre cloths |
| Monthly descale | Food-safe descaler, rinse cloths, drain check tool |
How to clean the interior of a commercial speed oven
Daily spot clean
- Confirm power is isolated and the unit is fully cool.
- Remove any loose food debris with a dry cloth or soft brush.
- Wipe all interior surfaces with a microfibre cloth dampened in warm water and mild detergent.
- Pay attention to the ceiling, side walls, and the area around the heating elements.
- Dry all surfaces thoroughly with a clean cloth before restoring power.
Weekly deep clean
- Isolate power and allow 30–90 minutes cool-down and ventilation.
- Remove racks, trays, and — where the OEM manual permits — the bottom heating element.
- Apply manufacturer-approved cleaner to baked-on deposits. Follow the contact time stated on the product label.
- Work with a soft nylon brush on stubborn soils. Do not scrub glass or coated surfaces.
- Rinse all surfaces with a clean damp cloth, removing all cleaner residue.
- Dry fully before reassembling and restoring power.
The Parts Town speed oven maintenance guide specifically recommends removing racks and, where permitted, the bottom heating element for deep cleaning, and warns against abrasive cleaners that may damage finishes.
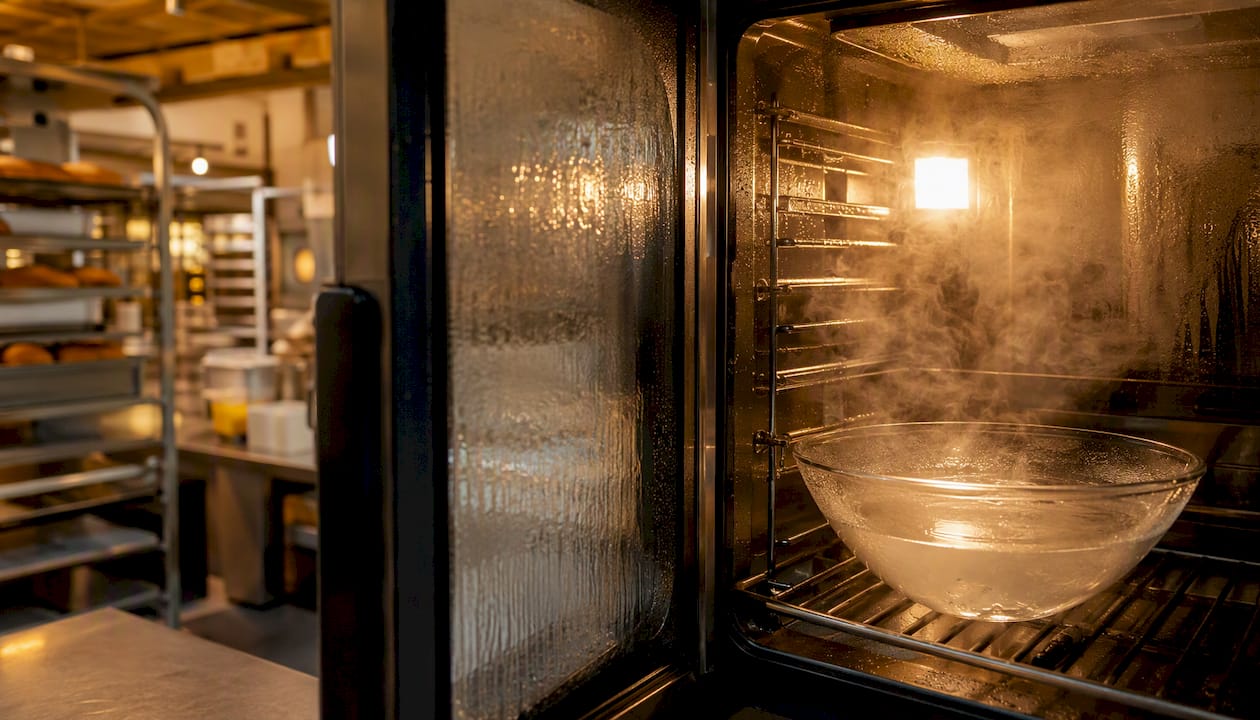
Pro Tip: If baked-on soils are particularly stubborn, place a heat-safe bowl of water inside the cavity and run a short steam cycle (where the manufacturer permits this). The vapour softens deposits and cuts your scrubbing time significantly. Thermador recommends a water-and-vinegar mix for lighter soils using the same method.
How to clean removable parts, the turntable, and the exterior
Removable parts: removal, cleaning, and reassembly
- Remove racks and trays by sliding them straight out — no tools required on most models.
- Lift out the turntable plate by gripping the edges and pulling straight up.
- Remove the roller ring by lifting it clear of the base.
- Wash all removed parts in warm water with mild detergent. A commercial sink or dishwasher (where the OEM manual confirms dishwasher-safe) works well for trays and racks.
- Rinse and dry completely before returning parts to the cavity. Moisture left on roller rings causes corrosion and noise.
Exterior controls, door glass, and door seals
- Wipe the exterior casing with a damp microfibre cloth and mild detergent. Dry immediately.
- Clean the door glass with a soft cloth and mild detergent. Never use abrasive pads on glass.
- Wipe control panels and touchscreens with a barely damp cloth. Excess moisture in control housings causes electrical faults.
- Inspect door seals (gaskets) for cracks, tears, or compression loss. A damaged seal lets heat escape, forces the unit to cycle harder, and is a common cause of uneven cooking.
- Clean hinges with a dry or barely damp cloth; do not lubricate unless the OEM manual specifies a product.
Photograph any visible wear on seals or damaged parts before logging a service call. Engineers can often triage remotely from a clear image, which speeds up parts ordering.
Descaling and keeping the steam function working properly
Scale is the silent killer of steam-assisted speed ovens. In hard-water areas of the UK — much of the South East, East Anglia, and the Midlands — mineral deposits can build up quickly enough to block drain channels and reduce steam output within weeks of a missed descale.
Signs you need to descale now
- Reduced or uneven steam output during cooking cycles.
- Unusual noise from the steam generator (a rattling or hissing that was not there before).
- Off-taste or odour in food cooked with steam.
- Visible white or grey scale deposits around the drain or water inlet.
How to descale safely
- Isolate power and allow full cool-down.
- Check your OEM manual for the approved descaler and the correct dilution ratio. Never substitute a generic limescale remover.
- Apply the descaler and follow the manufacturer’s stated contact time exactly.
- Run the prescribed rinse cycle to flush residue from the system.
- Inspect the condensate drain for blockages and clear any debris.
- Log the descale date, product used, and any observations in your maintenance record.
Pro Tip: If scale is a recurring problem despite regular descaling, fit an inline water softener or filter to the oven’s supply line. This is a one-off investment that can halve descaling frequency in hard-water postcodes and reduces the risk of steam-system damage between service visits.
The American Society of Baking’s oven maintenance guidance lists scheduled inspection and calibration of instrumentation alongside descaling as core preventive tasks — not optional extras.
Troubleshooting common faults and knowing when to call an engineer
Most day-to-day issues have a safe in-house fix. A few do not, and getting that distinction wrong is a safety risk.
Issues you can address in-house:
- Uneven heating or longer cook times. Check the door seal for damage and confirm the cavity is clean. Blocked vents and a worn gasket are the two most common culprits.
- Odd noise during operation. A rattling sound often means a loose rack, debris on the roller ring, or a fan obstruction. Isolate power, cool the unit, and inspect before the next service.
- Unresponsive controls. Try a soft reboot: isolate power at the mains for 60 seconds, then restore. If the issue persists, check the OEM manual for a factory reset procedure.
Stop and call an authorised engineer when you see:
- A persistent burning smell that does not clear after cleaning
- Any visible damage to heating elements or internal wiring
- Electrical faults that return after a reboot
- Steam system failures that descaling does not resolve
- Any gas-safety concern (if the unit uses gas-assisted heating)
- Error codes that the OEM manual flags as requiring service
Calibration checks against a traceable reference thermometer should be part of your monthly routine. Subtle temperature drift affects product quality long before it triggers an error code.
A maintenance schedule you can drop straight into your rota
The structured daily/weekly/monthly/annual approach is the standard recommended across manufacturer and service resources for commercial speed ovens.
Record-keeping matters. Log every task with the date, the staff member who completed it, any observations, and photographs of wear or damage. This record is your first line of defence in a warranty dispute and demonstrates due diligence under food-safety compliance requirements.
When selecting a service contract, look for:
- Engineers authorised by your oven’s manufacturer (Wolf, Miele, Unox, Merrychef, and others all have approved networks)
- Confirmed access to genuine OEM spare parts
- Stated response times (next-day or same-day for critical faults)
- A service history log provided after each visit
What engineers actually see in professional kitchens
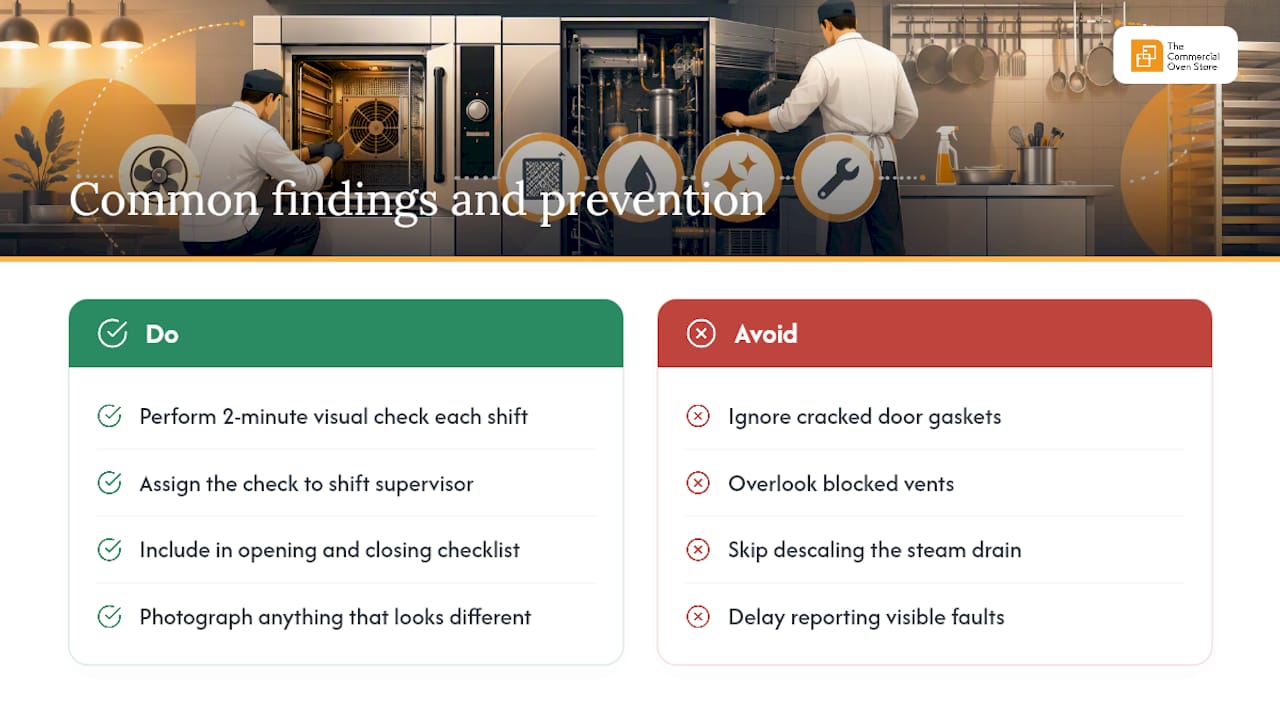
The most common finding on a service call is not a failed component. It is a blocked vent or a door gasket that has been visibly cracked for weeks, ignored because the oven was still technically working. By the time the fault becomes undeniable, the heating element has been cycling at higher load than it should, and the repair bill reflects that.
The second most common finding is a steam drain that has never been descaled. In hard-water areas, this can cause partial blockage within a few months of installation if no inline filter is fitted.
Both of these are entirely preventable with the schedule above. The fix is not a better oven; it is building a two-minute visual check into every shift handover. Assign it to the shift supervisor, make it part of the opening and closing checklist, and photograph anything that looks different from the day before. That habit alone catches the majority of issues before they become call-outs.
For Unox speed oven operators in particular, the model-specific manual will specify lubrication points on moving parts and any additional calibration steps — always cross-reference the OEM document alongside this general guidance.
Speed oven parts, service plans, and expert advice from Thecommercialovenstore
Keeping a commercial speed oven running well means having the right parts available and a reliable engineer on call when the schedule demands it. Thecommercialovenstore supplies commercial speed ovens from leading manufacturers including Unox, Rational, and Merrychef, alongside compatible accessories, installation kits, oven stands, grids, and trays.
Every unit sold comes with manufacturer-aligned guidance, and the team can advise on service plans, spare parts availability, and authorised engineer contacts for your specific model. Flexible payment options through iwocaPay mean you can spread the cost of a replacement unit or planned upgrade without disrupting cash flow.
To get a quote, check parts availability, or discuss a service plan for your kitchen, visit Thecommercialovenstore and speak to the team directly.
Sources
Always follow your oven manufacturer’s model-specific manual as the primary reference. The following resources provide additional guidance on commercial speed oven upkeep:
- Speed Oven Cleaning & Preventative Maintenance | Parts Town
- The Ultimate Guide to Commercial Oven Maintenance: Keep Your Equipment Running Efficiently | Boh
- Oven Maintenance | American Society of Baking
- Commercial Oven Maintenance Checklist for Bakeries and Food Processors
- Microwaves & Speed Ovens - Cleaning & Care | Thermador