

The reliable sequence for bread baking in combi ovens is a fully preheated chamber, a short wet-steam phase of 2 to 8 minutes at loading, then venting the moisture and finishing dry for colour and crust. Start around 220 to 230°C for lean crusty loaves and dial the steam phase to roughly 4 minutes for a home-scale combi. If your machine has no steam button, a lidded Dutch oven or a tray of boiling water on the base achieves a similar effect.
TL;DR:
- Maintaining a fully preheated chamber and timing the steaming phase to 4 to 6 minutes are crucial for optimal oven spring and crust development in home combi ovens.
- Applying the correct amount of steam is essential, with too little resulting in a dull crust and poor rise, while too much causes sogginess or tearing; moderate levels generally yield the best results.
- Starting with high temperatures of 220 to 240°C and carefully controlling steam during initial phases improves loaf volume and crust texture, especially for lean, crusty breads like baguettes or sourdoughs.
- Proper venting after the initial steam phase and finishing in dry heat prevents over-softening or toughness of the crust, with most baking times totaling around 40 to 55 minutes depending on the loaf type.
- Consistent, small adjustments and log-keeping are more effective for perfecting bread baking than chasing fixed settings, as each oven and loaf varies slightly.
Table of Contents
- What is bread baking in combi and how does steam actually help?
- Which combi mode and settings should you start with?
- How do you time the steam and vent phases?
- Four loaf types with settings you can copy today
- Why isn’t my bread rising or crisping properly?
- What professional combi practice teaches home bakers
- How do you clean a combi oven used for bread?
- What safety steps matter most when baking bread in a combi?
- The programme approach beats the recipe-hunting approach
- Ready for a combi that makes this easier?
- Sources
- FAQ
What is bread baking in combi and how does steam actually help?
Steam does one job that matters more than any other setting on your combi: it keeps the crust flexible for longer, so the loaf can rise before the surface locks in place. Oven spring, the sudden expansion you see in the first few minutes of baking, happens because gas cells expand, trapped carbon dioxide and ethanol vapourise, and the dough’s structure hasn’t yet set. Steam slows the rate at which the crust dries and stiffens, which is why a loaf baked without steam often has a duller, thicker crust and less overall volume.
According to research on oven spring mechanisms, most of that expansion happens in the first 10 to 15 minutes of baking, and steam extends the window during which the crust stays pliable, compared with just 5 to 6 minutes in a dry oven. That difference between 15 minutes of flexibility and 6 is the entire reason steam-injection ovens exist in professional bakeries.
The amount of steam you apply changes the outcome in measurable ways. A study that tested 100, 200 and 400 ml steam volumes found that higher steam volumes produced glossier, thinner crusts with lower failure force, while lower volumes gave a thicker, firmer crust. The effect on crust colour and mechanical strength was statistically significant.
In numbers: the same study found steam amount significantly affected crust colour, glossiness, and structural strength (p<0.05) across the tested volumes, meaning the difference wasn’t down to chance.
There’s a trade-off at every point on that scale:
- Too little steam produces a thick, dull, sometimes leathery crust and poor oven spring, because the surface sets before the dough finishes expanding.
- Intermediate steam tends to give the best balance of oven spring, appearance, and crispness that holds up during storage, according to industry steam quality research.
- Excessive steam can cause condensation that consumes latent heat, slows surface heating, and occasionally leads to a soggy or tearing crust rather than the crisp finish you want, as noted in work on steaming conditions and crust structure.
Chasing maximum steam isn’t the goal. Chasing the right amount for your loaf size and hydration is.
Which combi mode and settings should you start with?
Combi ovens use different names for broadly similar functions, and getting lost in manufacturer terminology is the single biggest reason home bakers give up on steam settings altogether. Once you understand what each mode actually does to the chamber, the settings become far less mysterious.
Combi-steam (sometimes called combination or steam-bake) blends convection heat with injected moisture, letting you set both temperature and humidity level simultaneously. Steam-only mode uses no fan-driven dry heat at all and is closer to a domestic steamer, useful only briefly at the start of a bake. Convection or bake mode is pure dry heat with fan circulation, the setting you switch to once the wet phase ends. Humidity-plus sits between the two, adding a lower level of moisture throughout rather than a concentrated early burst.

Rational’s iCombi application notes on baking describe exactly this kind of multi-stage programme, where temperature, humidity, and duration are set in sequence rather than as one fixed value for the whole bake. Domestic and small commercial combis increasingly offer the same staged logic, even if the interface looks simpler.
Baseline settings by loaf type:
- Crusty lean loaf (sourdough, baguette style): preheat to 230 to 240°C, apply steam for the first 4 to 6 minutes, then switch to convection at 220°C to finish and colour the crust.
- Sandwich loaf (tin bread, enriched or not): preheat to 190 to 200°C, use a shorter or lighter steam burst of 2 to 3 minutes, then finish dry for a soft, thin crust rather than a shattering one.
- Small rolls and buns: preheat to 220°C, steam for around 3 minutes since the smaller mass sets faster, then vent early to avoid over-softening the crust before it colours.
A few loading rules matter more than the temperature dial itself:
- Preheat fully before loading. A combi that hasn’t reached temperature will lose most of its stored heat the moment the door opens, undermining oven spring regardless of your steam setting.
- Use a baking stone or heavy tray where possible; stored thermal mass gives the base of the loaf a stronger, more even heat kick than a thin sheet pan.
- Load on the correct rack level. Middle position works for most home combis; commercial units with multiple racks may need slightly longer steam exposure on lower shelves where moisture pools less effectively.
- No steam button? Place a shallow tray of boiling water on the floor of the oven at loading, or bake inside a covered Dutch oven for the first phase, removing the lid partway through to mimic the vent step.
Pro Tip: Preheat 10 to 15 minutes longer than the display suggests it’s ready. Combi ovens often reach the set air temperature before the internal surfaces, stone, or racks have absorbed enough heat to give a strong base spring.
How do you time the steam and vent phases?
Think of a bake in three phases rather than one static setting, because that’s closer to what actually happens to the dough as it heats. Industry guidance on steam quality profiling frames this as tracking the bread’s thermal and hydration needs stage by stage, rather than applying one blast of moisture and hoping it works for the whole bake.

Phase A, wet steam (minutes 0 to 4 to 8): this is the window where you want maximum humidity in the chamber. Inject steam immediately at loading, before the door has a chance to lose heat. Watch for visible condensation on the door glass, a reasonable sign the chamber humidity is high enough. For a small domestic combi chamber, a 100 to 150ml water reservoir or one steam cycle is usually enough; larger commercial chambers may need closer to 200 to 400ml, consistent with the volumes tested in the steam volume study.
Phase B, controlled ramp (minutes 4 to 10, roughly): vent the chamber gradually rather than throwing the door open. Many combis have a manual vent or damper control; crack it or switch to a lower humidity setting so moisture escapes without a sudden temperature crash. This is where oven spring finishes and the crust begins to set with structure rather than staying gummy.
Phase C, drying and finishing (remaining bake time): switch fully to convection or bake mode, no added moisture. This is where colour, crackle, and the final crust texture develop. A 45 to 55 minute total bake for a standard 800g loaf typically spends 40 to 45 of those minutes in this dry phase.
Adjust by loaf size and hydration:
- Larger, denser loaves need slightly longer in Phase A, closer to 6 to 8 minutes, since more dough mass means more surface area needs to stay flexible for longer.
- High-hydration doughs (75% and above) already carry more internal moisture, so err on the shorter end of the steam window to avoid over-wetting the crust before it sets.
- Small ovens with limited chamber volume reach steam saturation faster, so less water achieves the same relative humidity than in a large commercial cavity.
Pro Tip: Wet steam, the visible cloud you get from a quick water injection, hydrates the surface fast but escapes quickly too. Dry steam or a slow, sustained humidity setting keeps the surface moist for longer without drenching the crust. If your combi offers both, use wet steam for the opening burst and dry steam or humidity-plus for the tail of Phase A.
Four loaf types with settings you can copy today
These are starting points, not fixed laws. Every combi behaves slightly differently depending on chamber size, door seal, and steam delivery method, so expect to nudge the numbers on your second or third bake.
-
Sourdough boule. Preheat to 240°C. Load onto a preheated stone or heavy tray, steam for 5 minutes, vent for 2 minutes while dropping to 220°C, then finish dry for 30 to 35 minutes. Check for doneness with an internal temperature of 96 to 99°C rather than relying purely on colour, since dark crusts can mislead you on a fully steamed bake.
-
Baguettes and rolls. Preheat to 240 to 250°C, the higher end of the range, because the thin shape needs a fast, aggressive spring. Steam for just 2 to 3 minutes, a shorter burst than a boule needs, then vent quickly and finish at 220°C for 18 to 22 minutes for baguettes or 12 to 15 for rolls. The rapid crisping gives the open, irregular crumb baguettes are known for.
-
Sandwich loaf in a tin. Preheat to 190 to 200°C. A tin loaf doesn’t need aggressive oven spring since the pan constrains shape, so use humidity-plus rather than a full wet-steam blast, roughly 2 minutes of light moisture, then bake dry for 35 to 40 minutes. This keeps the crust thin and soft rather than thick and blistered, which is what you want for a loaf meant for slicing and sandwiches.
-
Enriched dough (brioche, milk loaf, fruit loaf). Preheat to 180 to 190°C, noticeably lower than lean dough, because sugar and fat content mean these loaves brown much faster. Reduce steam to a single short burst of 1 to 2 minutes or skip it entirely, then finish at the same temperature for 25 to 30 minutes, watching closely after the 20 minute mark. Too much steam or heat here gives a dark, sometimes bitter crust before the centre has finished baking.
Why isn’t my bread rising or crisping properly?
Most combi bread problems trace back to one of four causes, and diagnosing which one you’re dealing with usually takes less time than the next bake.
Poor oven spring almost always comes down to underproofed or overproofed dough, a chamber that wasn’t fully preheated, or a missed steam phase. Check your dough temperature before baking; anything below 22°C slows fermentation and yeast activity enough to blunt the spring regardless of oven settings. If proofing and temperature both check out, the fix is usually more preheat time, not more steam.
Crust tearing or blowouts point to scoring that’s too shallow, or a steam phase that’s too short to let the surface flex before it sets. Score at a 30 to 45-degree angle with a sharp blade or lame, cutting roughly 1cm deep on a boule. If tearing continues, extend Phase A by a minute or two rather than deepening the score further.
Crust too hard usually means the drying phase ran too long or too hot, or storage after baking let residual moisture escape entirely. Shortening Phase C by 5 minutes or dropping the finish temperature by 10°C is often the whole fix. Crust too soft or chewy, the opposite fault, usually means too much steam lingered too late into the bake; vent earlier next time.
- Use an oven thermometer to check your combi’s actual chamber temperature against the display, since many units drift by 10 to 15°C over time.
- A digital probe thermometer removes the guesswork from doneness checks, particularly for larger boules where colour alone is unreliable.
- Log every bake, temperature, steam minutes, vent point, total time, so you can compare results rather than guessing what changed.
Pro Tip: Make one small change per bake, not three. A shift of 2 to 5°C or 1 to 2 minutes in any single phase is usually enough to see a clear difference next time, and it tells you exactly which variable caused the improvement.
What professional combi practice teaches home bakers
Commercial combi ovens like those built around Rational’s iCombi platform run bread programmes as multi-stage sequences, temperature, humidity, and time set in steps rather than as one fixed value for the whole bake. That’s the same logic behind the three-phase approach in this article, just running at a larger scale and with tighter humidity control than most domestic units offer.
What translates directly from commercial to consumer kitchens is the discipline of small, deliberate adjustments rather than guesswork. Professional bakers rarely overhaul a whole recipe between batches; they nudge one variable, watch the result, and fine-tune by 2 to 5°C or 1 to 2 minutes at a time until the loaf is consistent.
That habit matters more than any single setting in this article:
- Save a working programme once you find one, rather than rebuilding it from memory every bake.
- Log the tweak and the result together, so a change that helped isn’t lost by the next session.
- Treat your first few bakes as calibration, not failure, since every combi chamber behaves slightly differently from the manufacturer’s stated specification.
How do you clean a combi oven used for bread?
Steam-heavy bread baking leaves mineral deposits and starch residue that plain wiping won’t shift, so a combi used regularly for bread needs a slightly different cleaning rhythm than one used mainly for roasting or reheating.
Run a descaling cycle on the schedule your manufacturer specifies, typically more often than a combi used only for savoury cooking, since the repeated steam injection needed for bread accelerates limescale build-up inside the boiler and steam lines. Hard water areas in particular will see faster scale accumulation, and a neglected boiler eventually reduces steam output, which shows up as weaker oven spring long before any warning light appears.
Wipe down the door seal and glass after every bake session while the oven is still warm but not hot enough to burn you. Flour dust and condensation combine into a sticky film that hardens if left overnight, and a compromised door seal lets steam escape mid-bake, undermining the very setting you’ve spent time calibrating.
Clean racks, stones, and trays separately from any automatic self-clean cycle, since baking stones in particular can crack under aggressive chemical cleaning programmes designed for metal surfaces. A stiff brush and warm water usually lifts baked-on flour without damaging the stone’s surface.
Use a cleaning product formulated for combi interiors rather than generic oven spray, since some standard degreasers react badly with stainless steel steam generators. A dedicated detergent designed for combi and warewashing use avoids that risk entirely.
What safety steps matter most when baking bread in a combi?
Steam and high heat together create risks that a standard dry oven doesn’t, and it’s worth taking these seriously rather than treating them as an afterthought.
Steam burns are the most common injury, and they’re often worse than a dry-oven burn because steam transfers heat faster to skin than dry air at the same temperature. Always open the door slightly and step back before opening it fully, letting the initial burst of steam escape upward and away from your face and hands rather than releasing it all at once.
Water reservoirs and boiler systems should be filled and maintained exactly as the manufacturer specifies. Overfilling a manual water tray or ignoring a low-water warning on an automatic system can damage the steam generator or, in worse cases, cause a pressure release that’s forceful enough to injure whoever is standing nearby.
Hot stones and trays retain heat far longer than the surrounding air once removed from the chamber, and a baking stone that looks cool from a distance can still cause a serious burn on contact for 20 minutes or more after the bake ends. Use proper oven gloves rated for high heat, not just thin cotton ones, whenever handling stones or heavy trays.
Keep the area around the vent clear when the combi releases steam automatically between phases, since that’s usually the hottest and wettest point of the whole cycle, and it often triggers with no visible warning on the display.
The programme approach beats the recipe-hunting approach
Most advice on baking bread in a combi still treats it as a list of separate settings, a temperature here, a steam button there, rather than as one connected sequence. That’s backwards. The research on steam volume and crust structure makes clear that steam’s effect changes depending on when it’s applied and for how long, not just how much water goes into the chamber. Treating the bake as three linked phases, wet, ramp, dry, gives you a framework that survives moving between different combi models, which a single fixed “recipe” never does.
The conventional wisdom of “just add steam for the first ten minutes” undersells how much loaf size, hydration, and chamber volume change that number. A small domestic combi and a commercial multi-rack unit need genuinely different steam durations to hit the same result, and readers who copy a number from a recipe written for a different oven often end up troubleshooting a fault that was never really theirs to fix.
If you take one thing from this, take the discipline of small changes and saved programmes over constant recipe-switching. Consistency comes from repetition and fine adjustment, not from chasing a new set of numbers every time a bake goes slightly wrong.
— Simon
Ready for a combi that makes this easier?
A domestic combi retrofitted with steam settings can only take you so far if the chamber is small, the steam delivery is inconsistent, or the door seal has started to fail. A specialist retailer gives small bakeries and serious home operations direct access to genuine combi and convection ovens from established manufacturers, backed by expert advice on which model actually suits your bake volume and kitchen setup, rather than a generic recommendation.
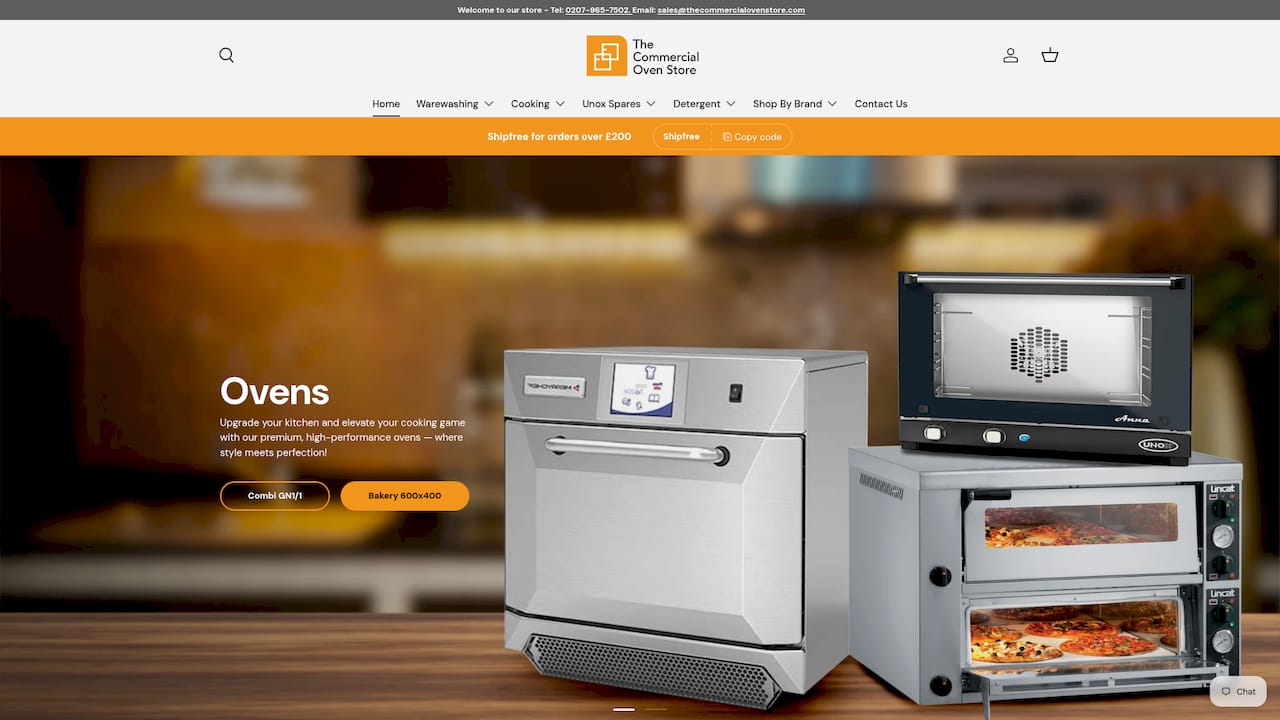
Scaling up from occasional home bakes to consistent daily output usually means moving to a unit built for repeated steam cycles without the boiler wear a domestic appliance suffers under daily use. A range of combi ovens covers everything from compact countertop units suited to a small bakery counter through to larger multi-rack machines, and purchases may include professional installation so the steam and vent systems are set up correctly from day one. Flexible payment options may be available to help manage the cost of acquiring a properly specified oven for your kitchen.
Browse a range of bakery ovens or visit the website for advice on selecting a combi oven that fits your bake volume, chamber size, and steam requirements.
Sources
- Effect of the amount of steam during baking on bread crust features and water diffusion
- Impact of steaming conditions on the structure and on the properties of bread crust; in the case of a crispy roll
- Oven spring: why bread rises in the oven | JayArr Bread
- Baking with the iCombi Pro combi oven
FAQ
Can I bake bread in a combi oven with a steam function?
Yes, and a combi with a dedicated steam function generally outperforms a standard oven for crust and oven spring, since it lets you control humidity precisely rather than relying on a tray of water. Use a short wet-steam phase at loading, then switch to dry convection to finish, following the multi-stage approach professional combis are built around.
How long does bread take to bake in a combi or convection oven?
A standard 800g lean loaf typically needs 45 to 55 minutes total, split between a short steam phase of 2 to 8 minutes and a longer dry finish. Smaller rolls bake in 12 to 15 minutes, while enriched loaves often need slightly longer at a lower temperature to avoid over-browning.
What are the downsides of a combi oven for bread baking?
The main downside is complexity: multi-stage programming takes some initial calibration, and mineral buildup from repeated steam cycles means more frequent descaling than a standard oven. Chamber size also matters, since smaller units reach steam saturation faster and may need less water than the volumes tested in research on steam amounts for larger cavities.
What oven mode should I use for baking bread?
Use combi-steam or combination mode for the first phase, since it lets you set both temperature and humidity together, then switch to convection or bake mode once you vent the moisture out. If your combi only offers humidity-plus rather than a dedicated steam injection, that works well for softer-crust loaves like sandwich bread.
What if my combi has no steam button at all?
Place a shallow tray of boiling water on the oven floor at loading, or bake the first phase inside a covered Dutch oven before removing the lid to finish dry. Both methods trap steam around the loaf in the same way a dedicated steam injection does, just with slightly less precise control over timing.