

Every UK combi oven install needs a drain sized to the unit’s capacity, run downhill with no uphill sections, built from temperature-rated pipework, and terminated outside the oven’s own footprint. Space-saver combis need at least a 1.5" line, mid-size 6–10 pan ovens need 2", and 20-pan units need 2.5". Where gravity drainage isn’t possible, a rated waste pump replaces it. Get any of these wrong and you’re looking at nuisance callouts, warranty disputes, or a flooded pass.
TL;DR:
- Proper drain sizing depends on oven capacity, ranging from 1.5 inches for space-savers to 2.5 inches for large 20-pan units, with pipe diameter never reduced mid-run.
- Drains must be installed with a minimum downhill slope of ¼ inch per foot, avoiding any uphill sections, to ensure reliable flow and prevent backups.
- Stainless steel pipework is recommended for durability at high temperatures, while plastic pipes are unsuitable for the near-boiling discharges of combi ovens.
- Use a waste pump when gravity drainage isn’t possible, ensuring it matches temperature, cycles appropriately, and includes a non-return valve for backflow prevention.
- Manufacturers’ installation manuals specify interactions between diameter, slope, and venting, emphasizing the importance of following their guidance closely for successful commissioning.
Table of Contents
- Quick installation checklist for on-site use
- Drain size, materials and temperature considerations
- Routing, slope, vents and traps
- When to use a waste drain pump and selecting the right solution
- Best-practice connection details and site layout tips
- UK regulatory and health & safety considerations
- Publisher perspective and field tips from The Commercial Oven Store
- Indirect waste, siphon boxes and when a trap isn’t needed
- Maintenance and cleaning requirements to prevent blockage
- Common installation pitfalls and troubleshooting on UK sites
- Water hardness, grease build-up and how to manage both
- Why manufacturer manuals still beat generic plumbing advice
- Get your combi drain specified correctly before you order
- Manufacturer manuals worth keeping on file
- Sources
Quick installation checklist for on-site use
Before the appliance goes anywhere near its final position, run through this on-site checklist:
- Diameter: 1.5" for space-saver combis, 2" for 6–10 pan ovens, 2.5" for 20-pan units, matched to the oven capacity you’re specifying.
- Slope: minimum ¼ inch fall per foot of run, downhill only, never uphill.
- Temperature rating: pipework rated for at least 203°F discharge.
- Outlet position: drain terminates outside the oven’s perimeter, never directly beneath it.
- Couplers: flexible connector at the appliance stub to absorb movement and misalignment.
- Accessibility: the full run stays reachable for cleaning and service, not boxed in behind cabinetry.
- Never reduce the diameter partway along the run, and never install the oven directly over a floor drain.
Drain size, materials and temperature considerations
Diameter isn’t a fixed number. It scales with oven capacity and the complexity of the run. Henny Penny’s own install notes specify 1.5" for space-saver units, 2" for 6 to 10 pan ovens, and 2.5" for 20-pan ovens, with drains running downhill at a minimum of ¼ inch per foot. Cleveland’s installation guidance for its combi range pushes further: a run that’s short and straight can work with 2", but anything longer or carrying three or more elbows should step up to 2½" to keep flow moving without backing up.
Material matters as much as bore size. Stainless steel is the standard choice because it tolerates repeated near-boiling discharge without softening. Purpose-rated plastics can work on shorter, cooler runs, but standard schedule 40 PVC is a poor fit here. It’s rated for ambient water, not the intermittent near-100°C pulses a combi throws out, and repeated thermal cycling can soften or distort the pipe wall over a few years of service. If you’re unsure of run length or elbow count at design stage, oversize slightly rather than under.
Routing, slope, vents and traps
Whether the drain runs free-air into an open gully or connects into a closed pipe changes what else you need to install. An open floor drain is the simpler route: the combi discharges into free air above the gully, with roughly 25 mm (1") clearance, and gravity does the rest. A closed drain connection, tying directly into building drainage, needs its own air path or you risk vapour lock.
That risk comes down to traps. Most combis have a built-in siphon or drain box acting as the trap at the appliance end. Fit a second trap downstream in a closed system and you’ve created two water seals in series, which can trap air and stall flow unless a vent relieves the pressure.
Practical routing rules:
- Minimum fall of ¼ inch per foot (roughly 3% to 5%), consistently downhill.
- No uphill sections anywhere in the run, even short ones.
- Fit a vent or riser on closed systems with a downstream trap.
- Keep the appliance’s own siphon box as the only trap wherever possible.
When to use a waste drain pump and selecting the right solution
Gravity drainage assumes a floor drain sits within reach and below the appliance outlet. That’s not always true. Raised floors, mezzanine servery areas, long horizontal runs to the nearest gully, or any stretch that would need an uphill section all force the same solution: a waste drain pump rated for hot discharge.
Specify the pump against three criteria: temperature tolerance matching the appliance’s peak discharge, a duty cycle that suits how hard the oven runs during service, and a non-return valve to stop backflow when the pump cycles off. Position it somewhere a technician can reach without dismantling cabinetry, with a local electrical isolator nearby. A pump wedged behind a fixed panel is a maintenance problem waiting to happen, and most call-outs on pumped systems come down to exactly that.
Best-practice connection details and site layout tips
Most drain failures on combi installs trace back to five avoidable habits, not a single catastrophic error. Fix these and you’ve dealt with the bulk of what goes wrong on UK sites.
- Never reduce the diameter mid-run. Lainox’s own guidance is explicit that the drain outlet must stay outside the oven’s perimeter and the diameter must never be stepped down between the appliance and the termination point.
- Avoid sharp, tight bends. Every 90 degree elbow adds resistance; sweep bends where the layout allows it.
- Keep the run out from under the appliance. A drain hidden beneath the oven’s footprint is unreachable the moment something blocks it.
- Fit a flexible coupler at the appliance stub. It absorbs the small movements that happen every time the unit is pulled for cleaning.
- Label isolation points clearly. Whoever handles service six months later shouldn’t have to guess where the shut-off is.
Pro Tip: Photograph the completed drain run before boxing it in or fitting kick panels. It costs two minutes on install day and saves an afternoon of guesswork the first time something needs tracing.
UK regulatory and health & safety considerations
Combi drains don’t sit outside the normal web of UK kitchen compliance, they sit inside it. Building control will want the drain route documented as part of the wider kitchen extract and drainage plan, particularly where it ties into existing floor gullies. Environmental health officers care less about pipe diameter and more about what’s flowing through it: high-volume or high-fat discharge can trigger a conversation about grease management long before it becomes a blockage problem.
Water companies are often the real gating factor. Trade effluent consents, permitted discharge temperatures, and whether a grease trap is required upstream of the drain are set locally, and they vary by region and by water company. Check this early in the specification stage, not after the oven has arrived on site. At handover, keep the model-specific installation manual, any sign-off documentation from the installer, and photographic evidence of the completed run. It’s a small file to assemble and it answers most disputes before they start.
Publisher perspective and field tips from The Commercial Oven Store
On UK sites, the same three failings turn up repeatedly: drains routed directly under the appliance, diameter quietly stepped down to fit an existing pipe run, and no isolation point anyone can find six months later. A site survey before the oven arrives catches all three, and it’s the single step that saves the most grief later. We’ve written a fuller breakdown of drain sizing and connection specs for anyone speccing multiple kitchens at once. At delivery, expect the model manual, a completed installation checklist, and clear sign-off documentation, kept on file for the next service visit.
Indirect waste, siphon boxes and when a trap isn’t needed
Most combi ovens ship with a built-in siphon, sometimes called a drain box or trap box, sitting at the appliance’s own outlet before the water ever reaches your pipework. Its job is exactly what a conventional plumbing trap does: hold a water seal that stops drain odours and gases travelling back up into the cooking chamber. Because that seal already exists inside the appliance, fitting a separate trap in the external drain line is usually unnecessary and can actively cause problems.
This is where indirect waste comes in. An indirect connection means the combi’s drain discharges into open air above a gully or tundish rather than plumbing directly into the building’s closed drainage system. Air gap intact, no second trap needed, and no vapour lock risk because there’s nothing downstream to trap pressure against. This is the simplest, most forgiving arrangement and it’s why manufacturers default to recommending it wherever a floor drain sits within reach.
Direct connection into closed pipework changes the picture. Here, the appliance’s internal siphon becomes the first of potentially two traps in series if the installer adds another one downstream, and that’s the exact combination that produces vapour lock. The fix isn’t removing the appliance’s siphon, you can’t, and shouldn’t try. It’s either avoiding a second trap altogether or fitting a vent that gives trapped air somewhere to escape. If you’re specifying a closed connection because there’s no accessible floor drain, treat the vent as compulsory, not optional, and check the model manual for the manufacturer’s exact recommendation before finalising the layout.
Maintenance and cleaning requirements to prevent blockage
A combi drain that was specified correctly on day one can still fail eighteen months later without a maintenance routine behind it. Fat, starch residue, and mineral scale don’t announce themselves. They build slowly, narrowing the effective bore of the pipe until a routine clean suddenly produces standing water in the pan below.
Weekly checks should cover the visible run: look for slow drainage during the clean-down cycle, any smell around the outlet, and standing water at the base of the appliance after a wash. Monthly, the drain line itself needs flushing, ideally with a descaler appropriate to your local water hardness rather than a generic drain cleaner, since aggressive chemical cleaners can attack pipe joints and seals over repeated use.
Where the appliance uses a siphon or drain box, that component needs its own attention. Residue collects at the base of the siphon faster than anywhere else in the system, and a blocked siphon reads to the operator as a “drain problem” when it’s actually a five-minute clean inside the appliance itself. Check the model manual for the manufacturer’s recommended descaling interval and stick to it, particularly in hard-water areas where scale accumulates faster than the default schedule assumes.
Document each service visit. A simple log of when the drain was flushed and by whom turns a mystery blockage into a two-minute diagnosis instead of a half-day investigation.
Common installation pitfalls and troubleshooting on UK sites
UK kitchens throw up a specific set of problems that don’t always show up in manufacturer manuals written for other markets. Older buildings with cast-iron drainage, retrofitted extraction runs, and tight back-of-house floor plans all create pressure to compromise on the drain layout, and that’s exactly where trouble starts.
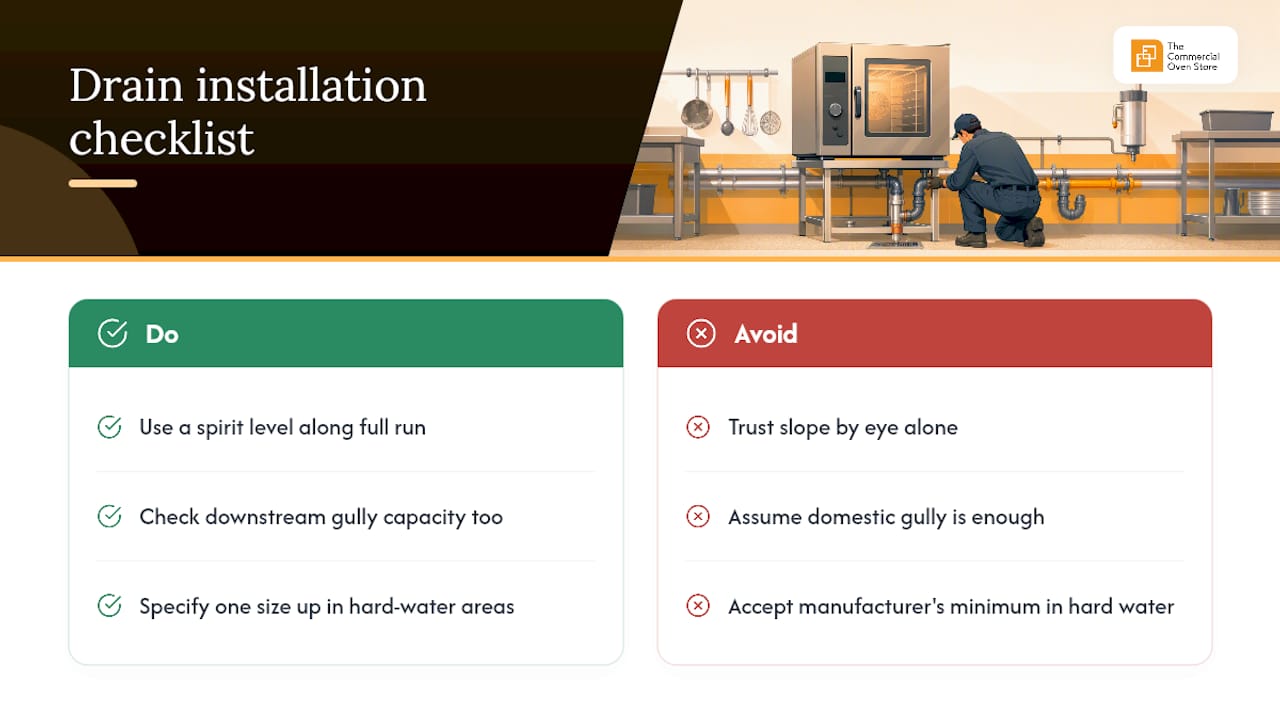
The most common fault is a drain routed with a false fall, appearing to slope correctly by eye but actually flat or slightly uphill over part of its length. This shows up as slow drainage that gets worse over weeks rather than failing outright, which makes it easy to misdiagnose as a blockage rather than a levelling error. A spirit level check along the full run at install, not just at the ends, catches this before it becomes a recurring callout.
Retrofits into older UK premises often inherit drainage designed for domestic loads, not commercial combi discharge volumes. A gully sized for a single sink struggles with the discharge volume of a 20-pan combi running back-to-back cycles during service. If you’re specifying into an existing building rather than a new-build kitchen, check the downstream capacity, not just the pipe from the oven to the nearest gully.
Hard water regions, common across large parts of England, add a second layer: scale narrows pipe bore faster than in soft-water areas, which means a diameter that was technically adequate on day one becomes marginal within a year or two. Specifying one size up from the manufacturer’s minimum is cheap insurance in these regions, and it’s worth raising at the design stage rather than after the first blockage callout.
Water hardness, grease build-up and how to manage both
Hard water and grease attack a combi drain in different ways, but both narrow the pipe over time and both are manageable with the right routine rather than a bigger pipe alone.
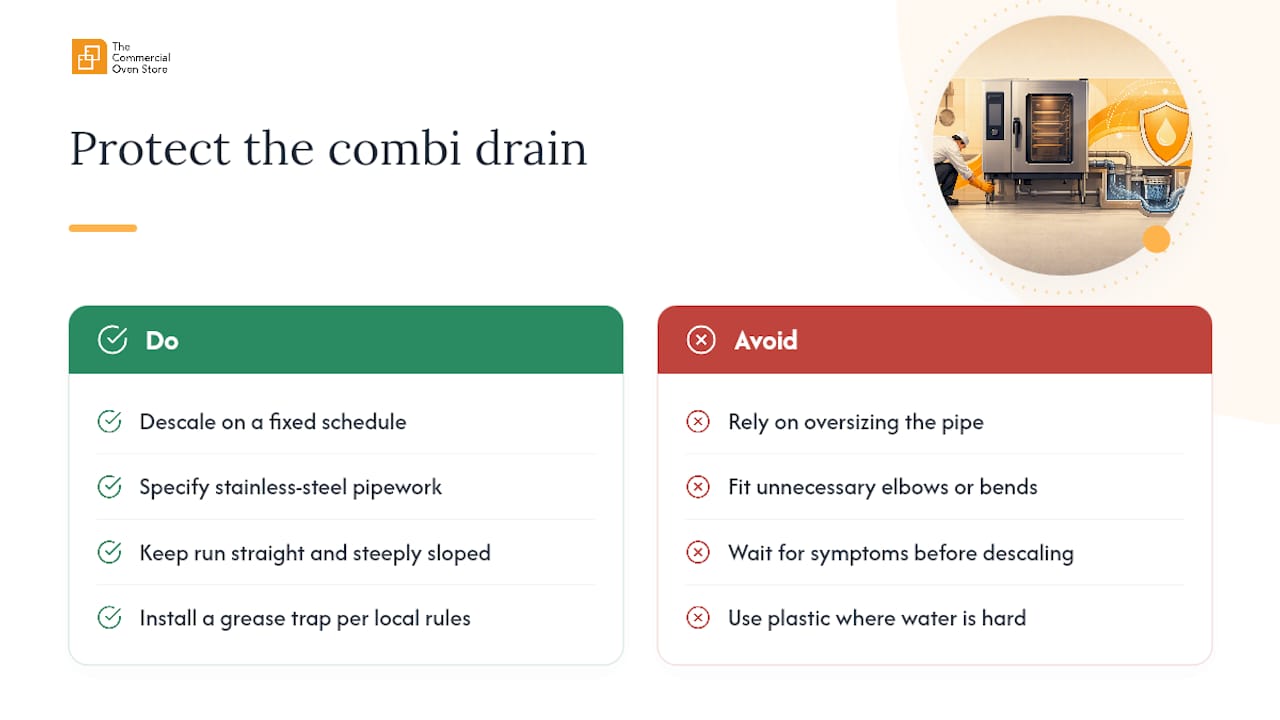
Limescale forms wherever hot water meets a surface repeatedly, and a combi discharge line sees exactly that cycle several times a day. In hard-water regions of the UK, scale can build up inside the pipe wall steadily enough to reduce effective bore within a year of continuous use. The practical mitigation is descaling on a fixed schedule rather than waiting for symptoms, and specifying stainless steel over plastic pipework wherever the water supply is known to be hard, since scale adheres less aggressively to a smooth metal bore.
Grease behaves differently. It doesn’t build evenly along the pipe, it collects at bends, at the base of siphons, and anywhere flow slows down. A drain with unnecessary elbows or a shallow fall gives grease more places to settle, which is one more reason to keep the run as straight and as steeply sloped as the site allows. Where the kitchen handles high fat loads, a grease trap upstream of the combi drain connection, sized and positioned according to the water company’s local trade effluent rules, does more to protect the drain than any amount of pipe oversizing.
Combined, the two problems compound each other: scale narrows the bore, then grease has less clearance to pass through before it catches. A maintenance routine that addresses both, not just one, is what actually keeps a combi drain performing at the diameter it was specified for.
Why manufacturer manuals still beat generic plumbing advice
The conventional approach to combi drainage treats it as a plumbing afterthought, something any competent plumber can size by eye once the appliance is on site. That’s backwards, and it’s where most of the expensive mistakes on UK sites originate. A generic drain that would satisfy building regulations for a domestic sink is routinely undersized, wrongly vented, or badly positioned for a commercial combi discharging near-boiling water in pulses throughout service.
What the manufacturer manuals get right, and what generic advice misses, is that diameter, slope, and venting aren’t independent choices. They interact. Step up the run length and the diameter needs to follow. Add a second trap and you’ve created a venting requirement that didn’t exist before. Treat these as a single specification decision made before the appliance arrives, not a series of separate calls made by whoever happens to be on site that day.
If there’s one priority above the rest, it’s this: get the model-specific manual in hand before the drain goes in, not after. Every manufacturer cited here, Henny Penny, Lainox, Cleveland, publishes slightly different numbers for slope, diameter, and clearance. Assuming they’re interchangeable is how a correctly-installed drain for one oven becomes an undersized one for the next.
— Simon
Get your combi drain specified correctly before you order
An alternative to guessing your way through a drain spec, or paying an installer to work it out on site after the oven’s already delivered. Combi ovens and the accessories that go with them are supplied, and technical sales teams can talk through drain sizing, siphon placement, and site constraints as part of choosing the right unit for a kitchen, not as an afterthought once it’s on the loading dock.

If you’re specifying a new kitchen or replacing an ageing combi, request a site survey through Thecommercialovenstore before you commit to a model. For a practical example of how capacity and drain requirements interact, see the Unox Bakerlux SHOP.Pro™ Master Arianna.Matic product page which sets out specification details. Get in touch for assistance to help get the drain right the first time.
Manufacturer manuals worth keeping on file
Consult the specific model manual before installation: Henny Penny, Lainox, Cleveland/Partstown, Fisher & Paykel.
Sources
- FlexFusion Platinum combi — drain install tips (Henny Penny service notes)
- Combi installation and drain layout guidance (Partstown/Cleveland range manual)
- Combi-steam installation guide (Fisher & Paykel)